Artist 12 Pro Lite
Product Overview
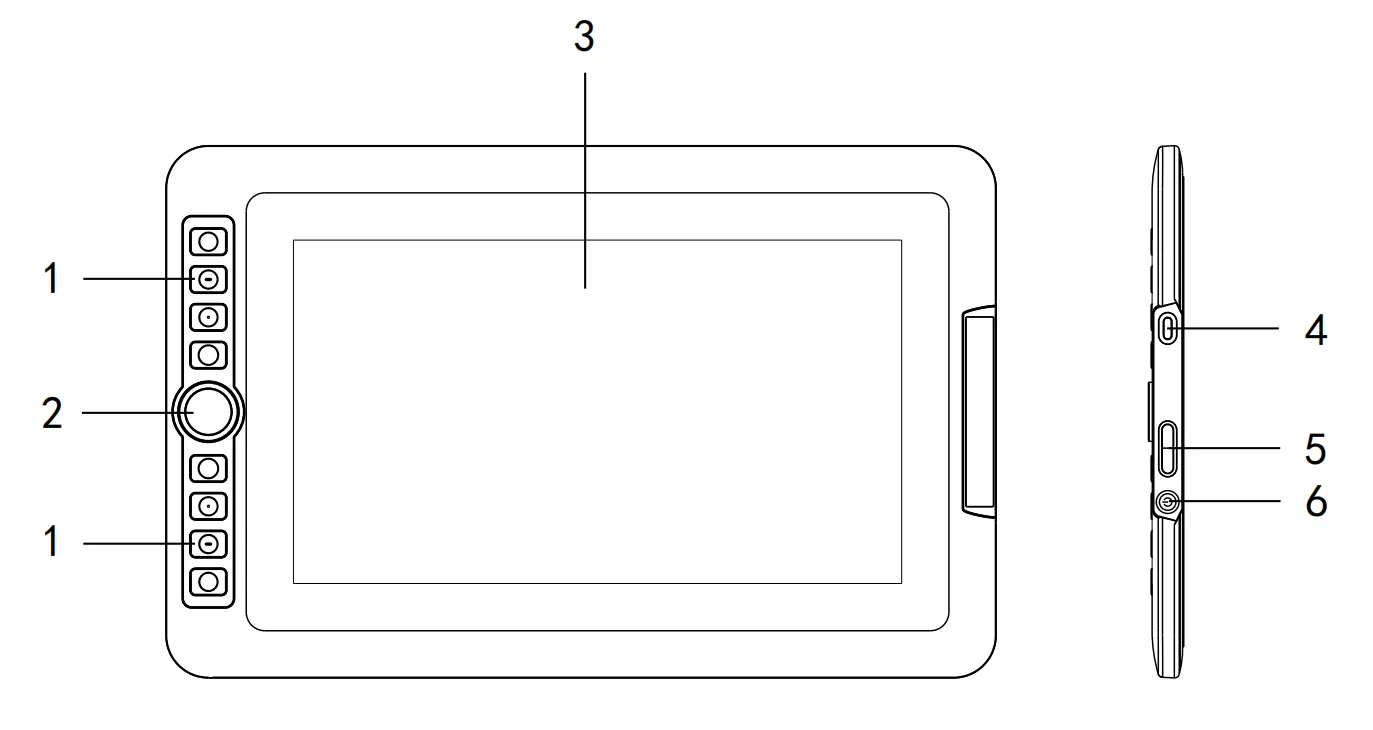
1. Express Keys
2. Roller
3. Display / Active Area
4. 3-in-1 USB-C Port
5. Brightness +/- Buttons
6. Power Button / Indicator
When powered on, the indicator lights up solid blue.
Accessory List
● Drawing Display ×1
● Battery-Free Stylus ×1
● 3-in-1 Cable ×1
● Glove ×1
● Cleaning Cloth ×1
● Quick Guide ×1
Product Connection
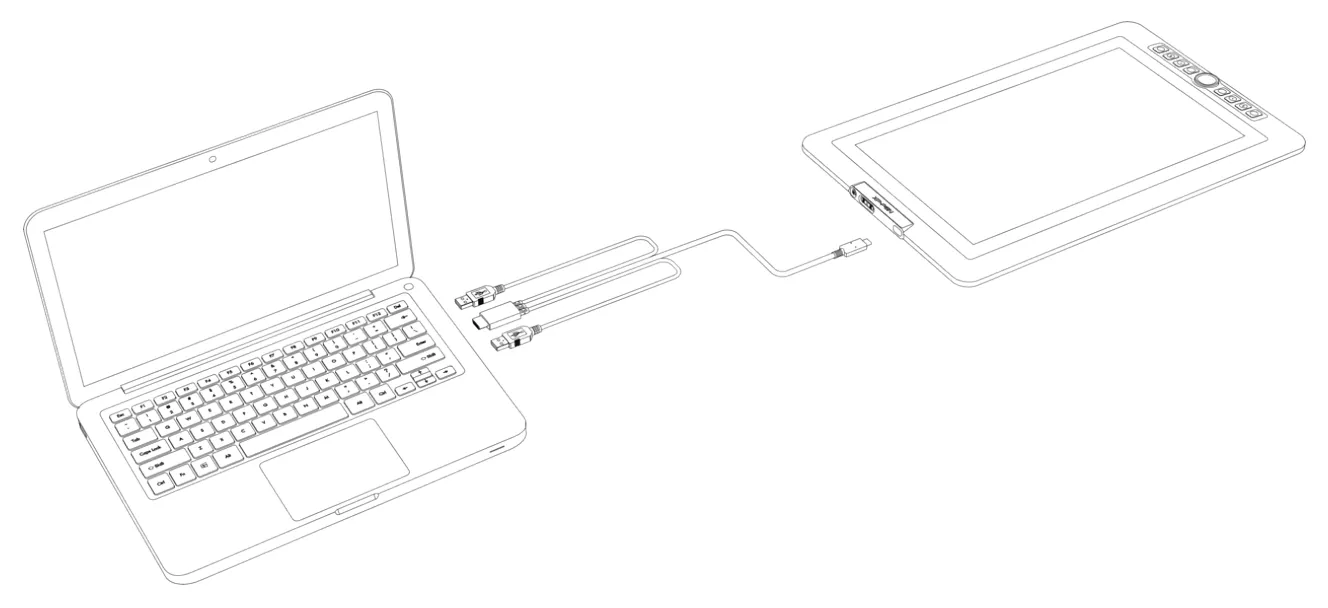
The drawing display is not a standalone device. It must be connected to a computer with USB-A and HDMI ports. For best performance, use the dedicated GPU HDMI port on your computer if available.
1. Plug the USB-C connector of the 3-in-1 cable into the drawing display.
2. Plug the HDMI and black USB-A connectors of the 3-in-1 cable into your computer.
3 .If the screen flickers or fails to power on, plug the red USB-A connector into your computer for supplemental power.
Compatible Systems
● Windows 7 or later
● macOS 10.10 or later
● ChromeOS 88 or later
● Linux
*Please select the driver corresponding to your operating system on the driver download page. This manual applies only to the XPPen Mac 4.0 driver. For the 3.0 driver, please refer to the XP-PEN New UI Driver Manual.
Driver Download & Installation
Driver Download
- Ensure your drawing display is connected to your computer.
- Visit the official website: www.xp-pen.com
- Go to the "Drivers" page, search for "Artist 12 Pro Lite", and click to enter the download page. Download and install the driver suitable for your operating system.
- Launch the driver, configure the settings, and test the product functions.
Before installation, please note:
● Close all antivirus software and drawing applications.
● Uninstall drivers from other brands of drawing tablets/displays.
● Restart your computer after installation is complete.
*It is recommended to use the latest driver for the best experience.
Driver Installation
Windows
After extraction, run the .exe file with administrator privileges and follow the prompts to complete the installation.
macOS
After extraction, run the .pkg file and follow the prompts to complete the installation. Then add the required security settings (System Settings → Privacy & Security → Accessibility). After authorizing, ensure that both XPPenDriver and XPPenTablet options are checked; otherwise, the device and driver may not function properly.
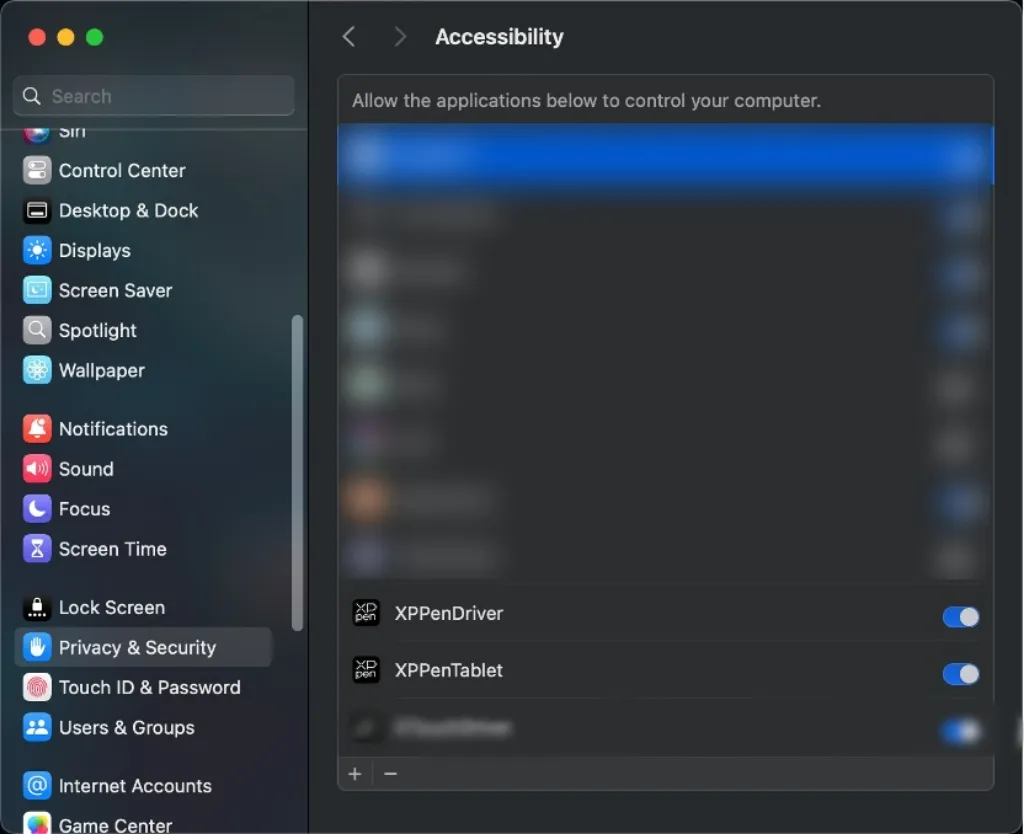
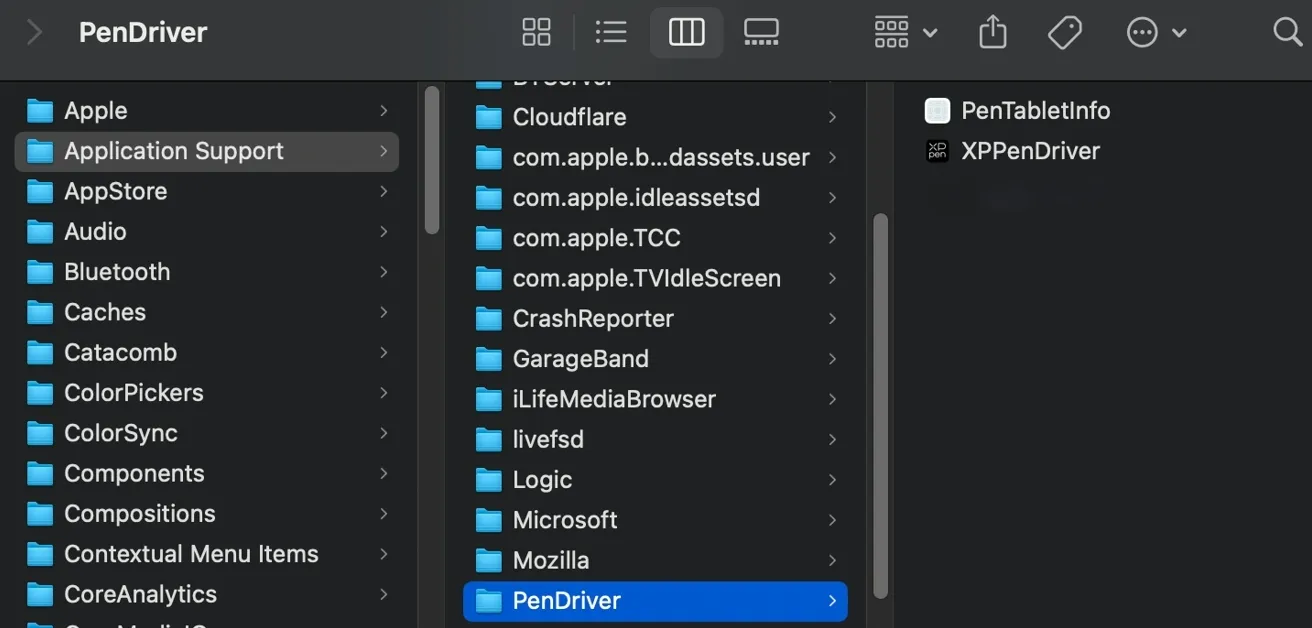
If the relevant options do not appear in the list, go to Library → Application Support → PenDriver to add them manually.
Linux
● DEB: Enter "sudo dpkg -i" in the terminal, drag the installation file into the terminal, and execute the command.
● RPM: Enter "sudo rpm -i" in the terminal, drag the installation file into the terminal, and execute the command.
● Tar.gz: Extract first, then enter "sudo" in the terminal, drag "install.sh" into the terminal, and execute the command.
Using the Driver
Device Connection
After the driver installation is complete, it will launch automatically. If it does not start automatically, please manually navigate to the driver folder and open the driver.
Windows path: Start → PenTablet
macOS path: Applications → XPPen → PenTablet
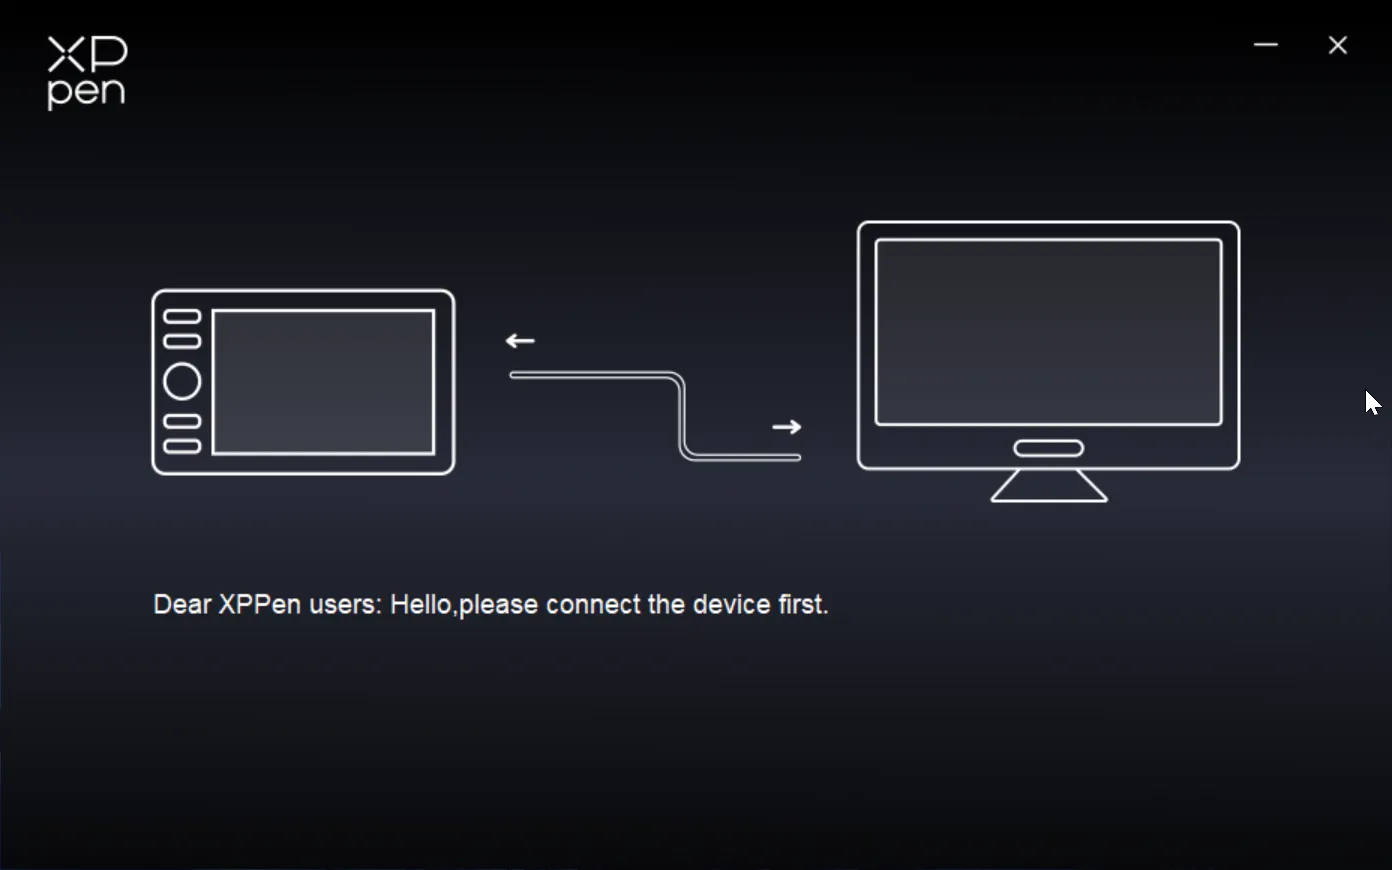
If the device is not connected or the connection fails, the following prompt will be displayed. Please try reconnecting the device, restarting the computer or driver, or contact customer support.
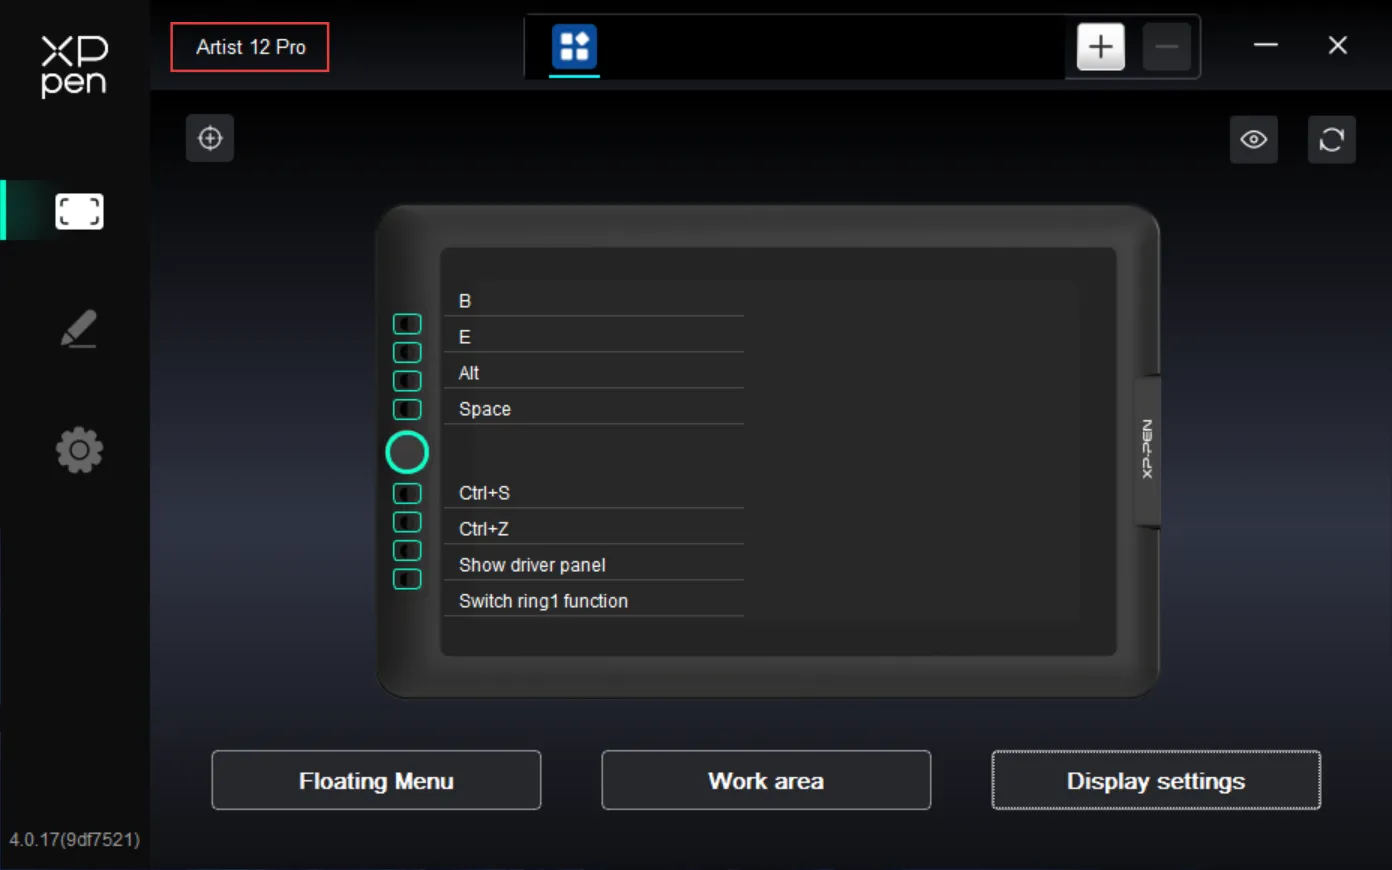
If the device is successfully connected to the computer, the device name will be displayed in the upper-left corner of the driver.
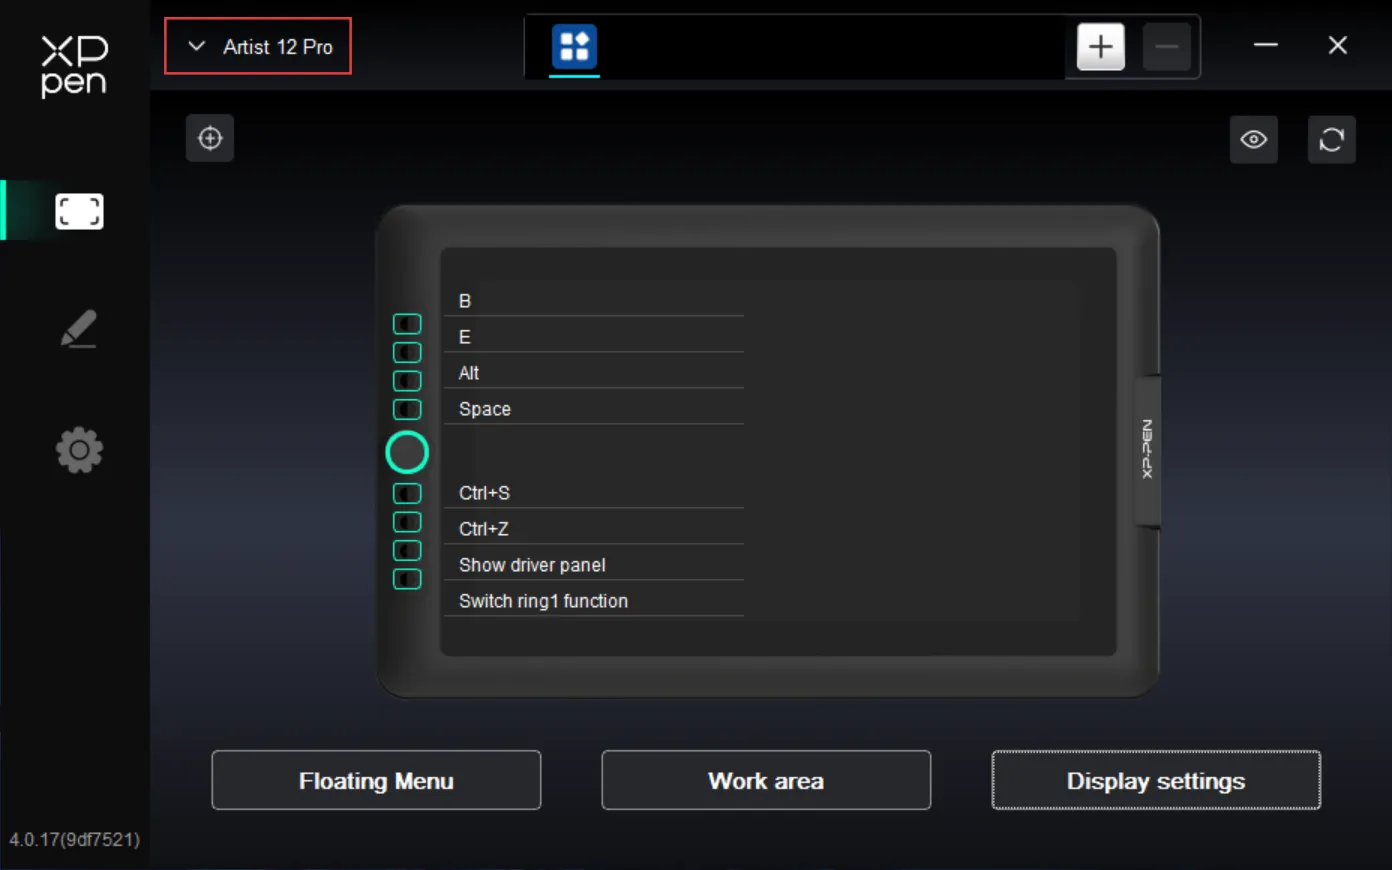
The driver supports up to three devices simultaneously. After switching to one device, you can customize its settings, and the changes will only apply to the currently selected device.
Floating Menu
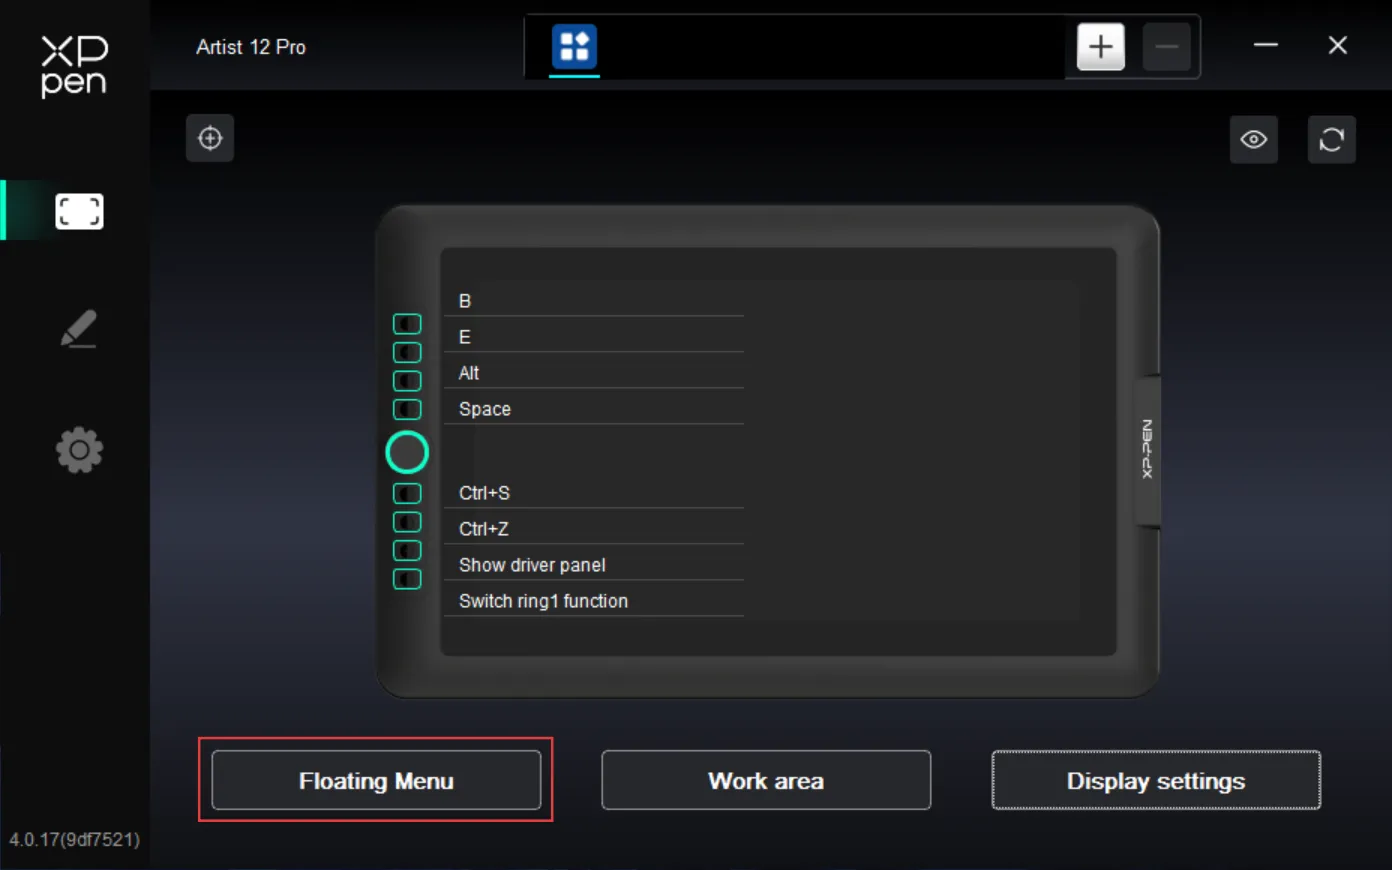
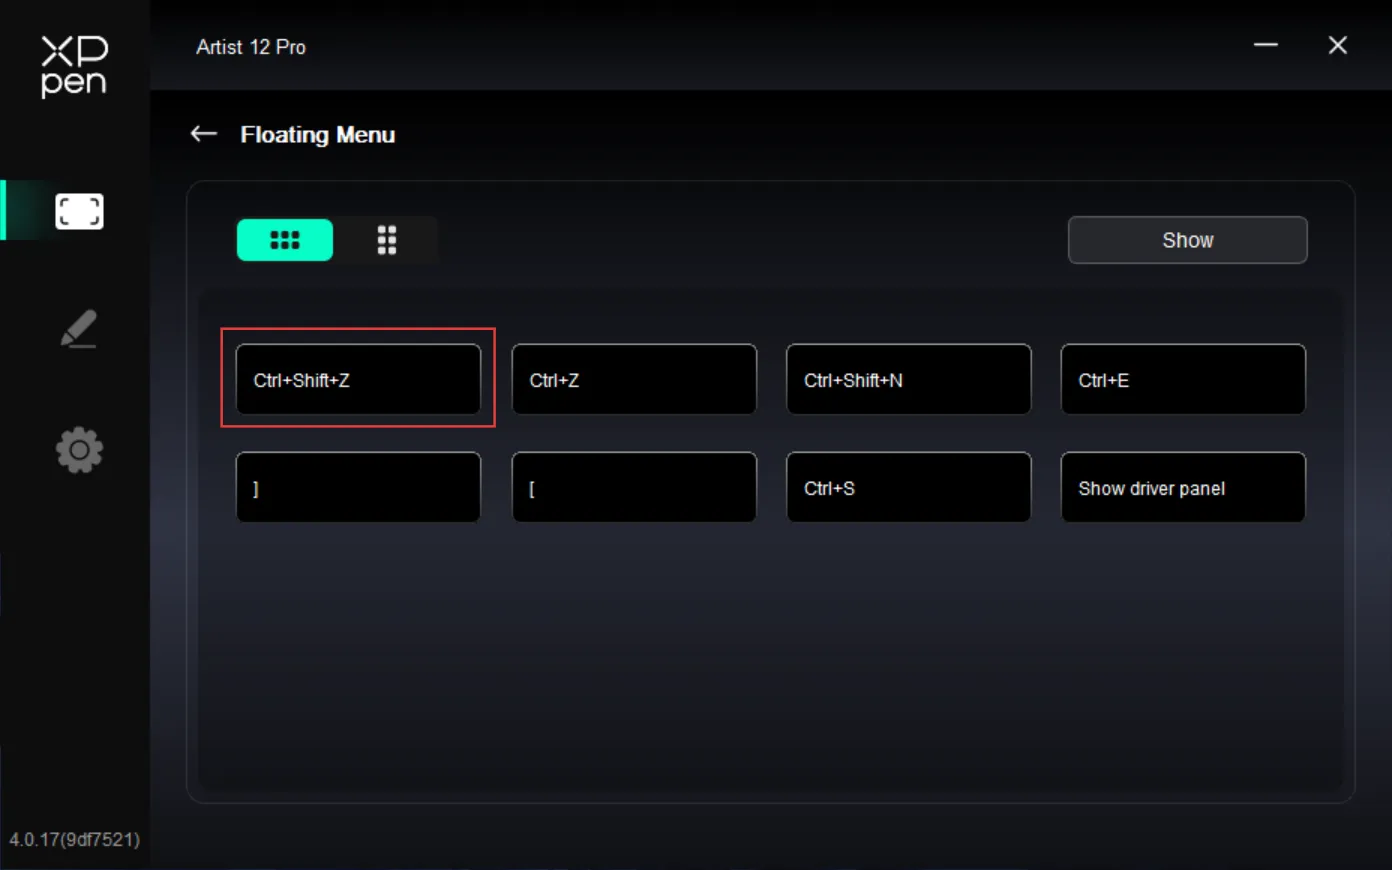
The Floating Menu can display shortcut buttons on the drawing display or computer monitor. You can assign frequently used operations to the Floating Menu, then click the buttons with the stylus or mouse to execute the assigned actions. Click the Floating Menu button on the driver home page to customize the display and functions.
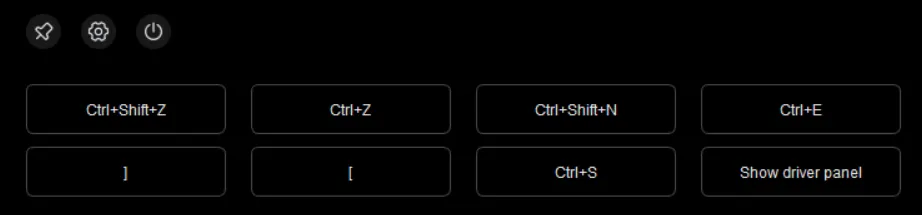
Top-left icon: Pin the display position, access driver Floating Menu settings, close the Floating Menu.
Driver Settings
Click the icons on the left side of the driver to switch between functions and configure the pen display settings, including:
● Device Settings
● Stylus Settings
● Driver Settings
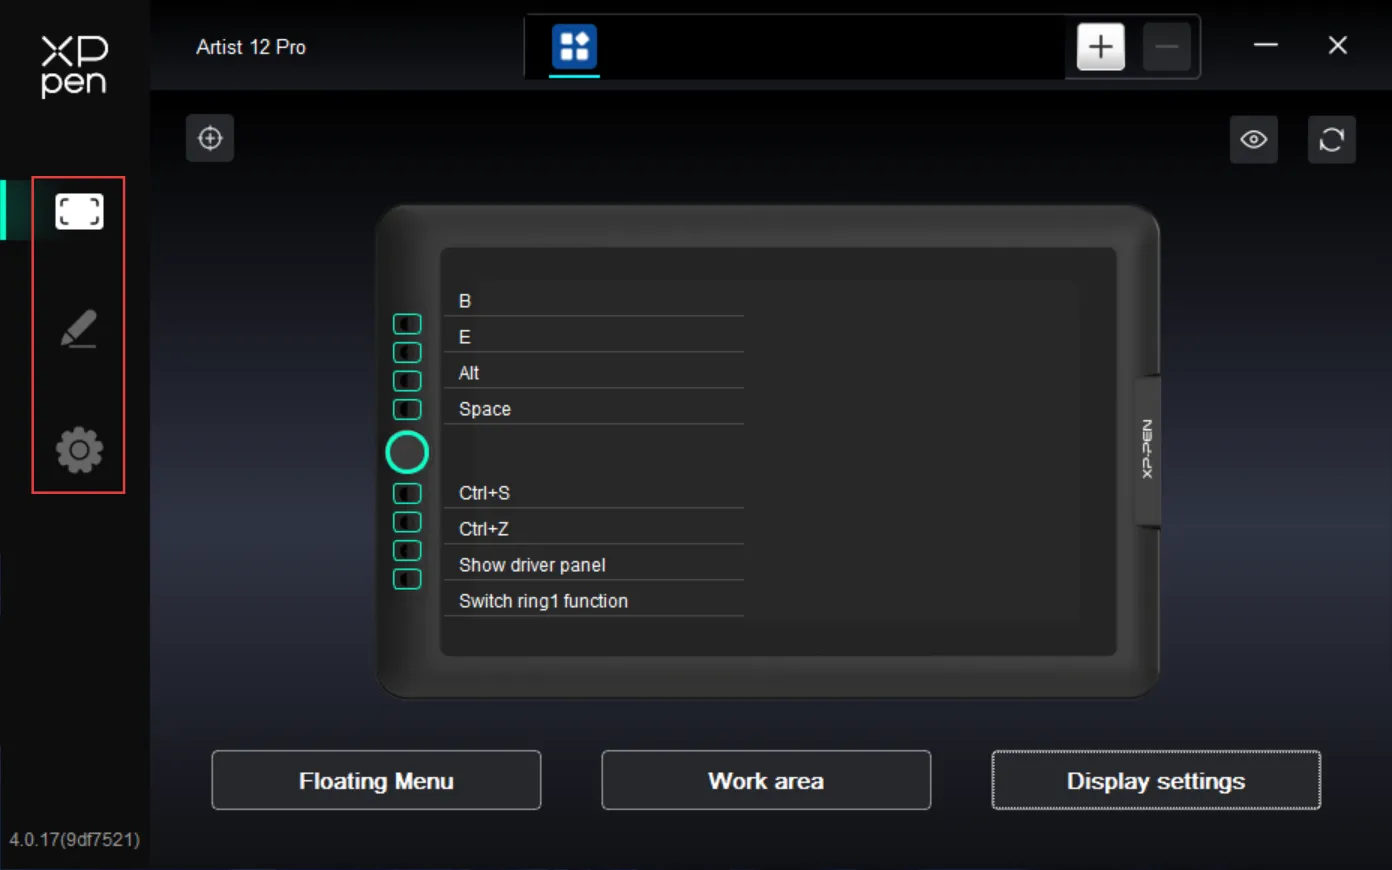
Device Settings
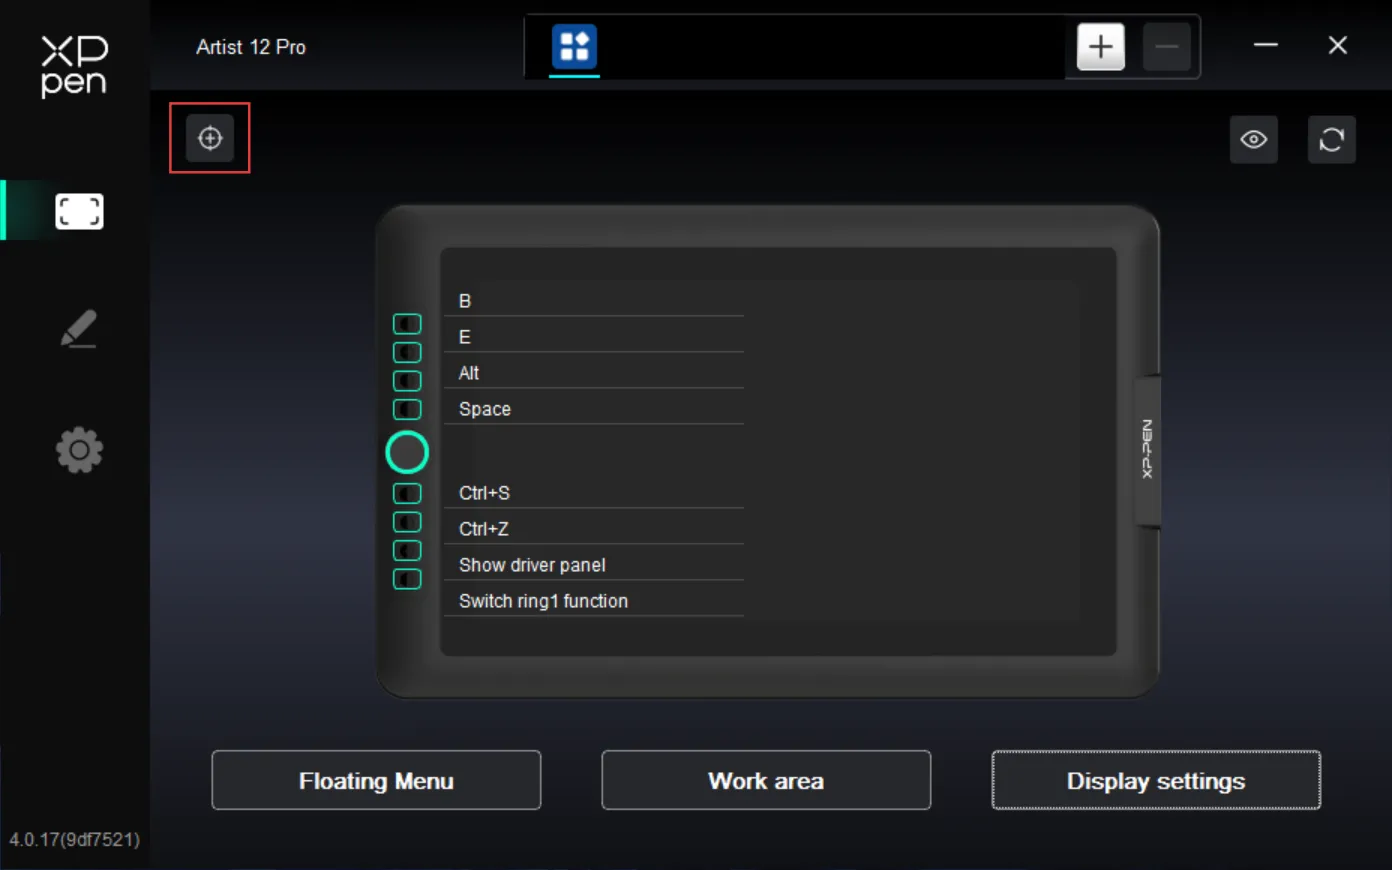
Screen Calibration
Ensure the stylus is correctly mapped to your drawing display. If not, refer to the Work Area section to adjust the mapping area. Then, using your usual grip, tap the red cross centers that appear on the display with the stylus tip to calibrate any offset between the stylus and the cursor.
Floating Menu
The Floating Menu can display shortcut buttons on the drawing display or computer monitor. You can assign frequently used operations to the Floating Menu, then click the buttons with the stylus or mouse to execute the assigned actions.
The Floating Menu supports both horizontal and vertical display modes. Click the top-left area to switch display modes. Click the "Show" button in the top-right to display the Floating Menu on the desktop.
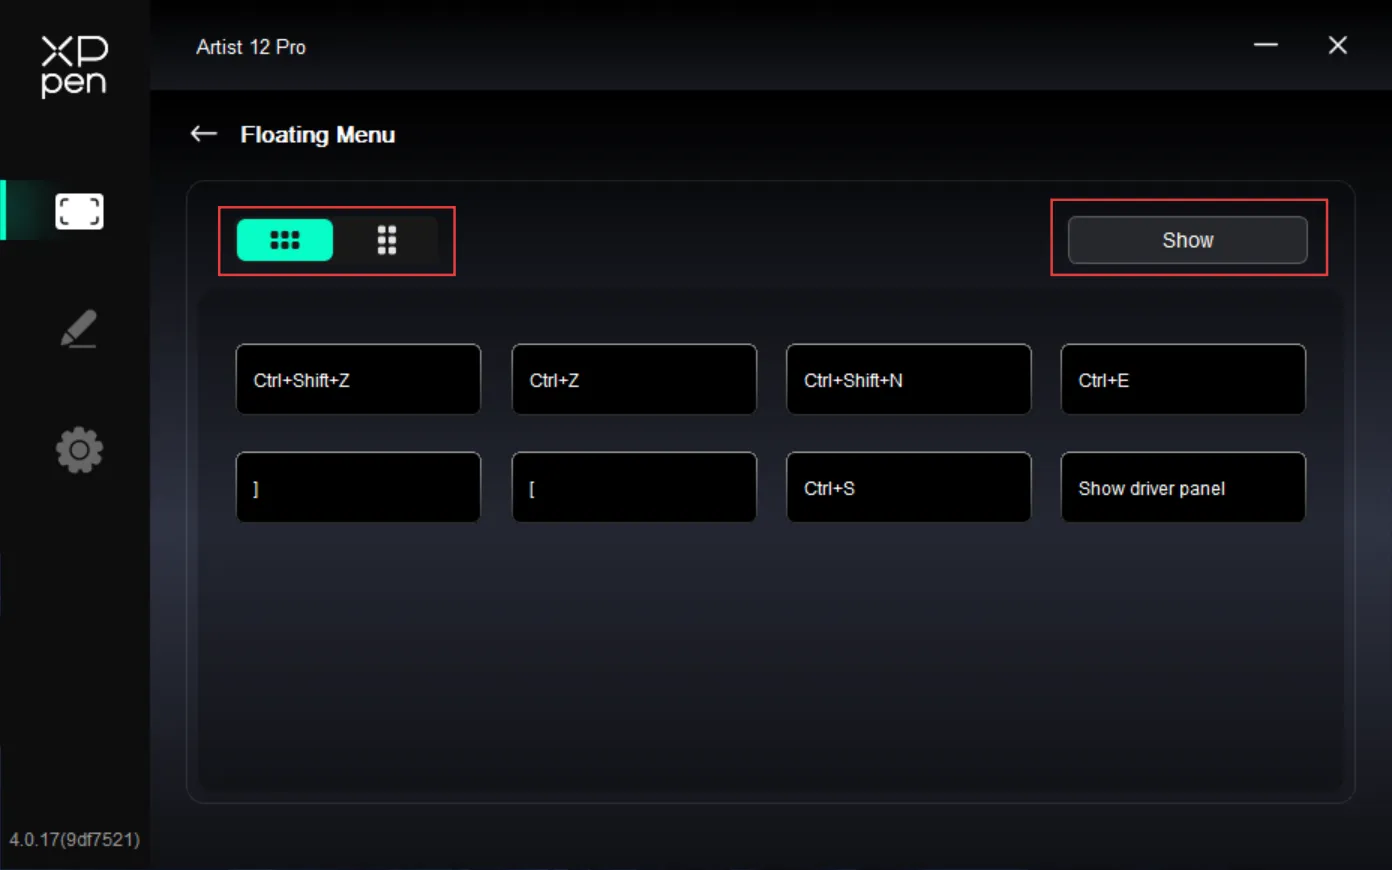
Click a shortcut button on the Floating Menu to configure its function. You can set it to a Keyboard Shortcut, Other, or Run Application.
Shortcut Keys:
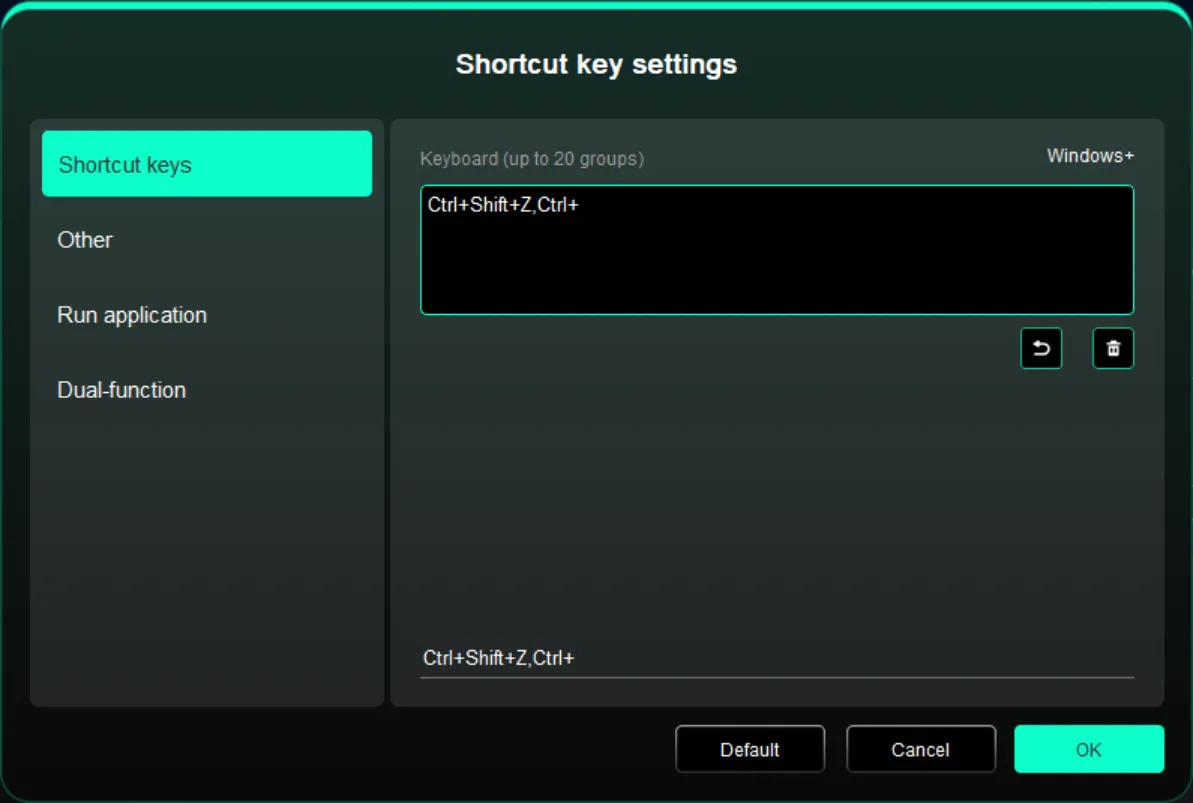
Configure a keyboard shortcut, e.g., set "Alt+A" in 3ds Max to use the Align tool.
Multiple keyboard shortcuts can be set in one group. For example, typing Ctrl+C, Ctrl+V will execute all configured shortcuts sequentially when the button is pressed.
Windows (Command): Add modifier key combinations. For example, to type Win(Cmd)+Shift+3, press Shift+3 and the driver will automatically add the system key.
Custom Name: Use the custom naming field at the bottom of the driver interface to assign a display name for the current function.
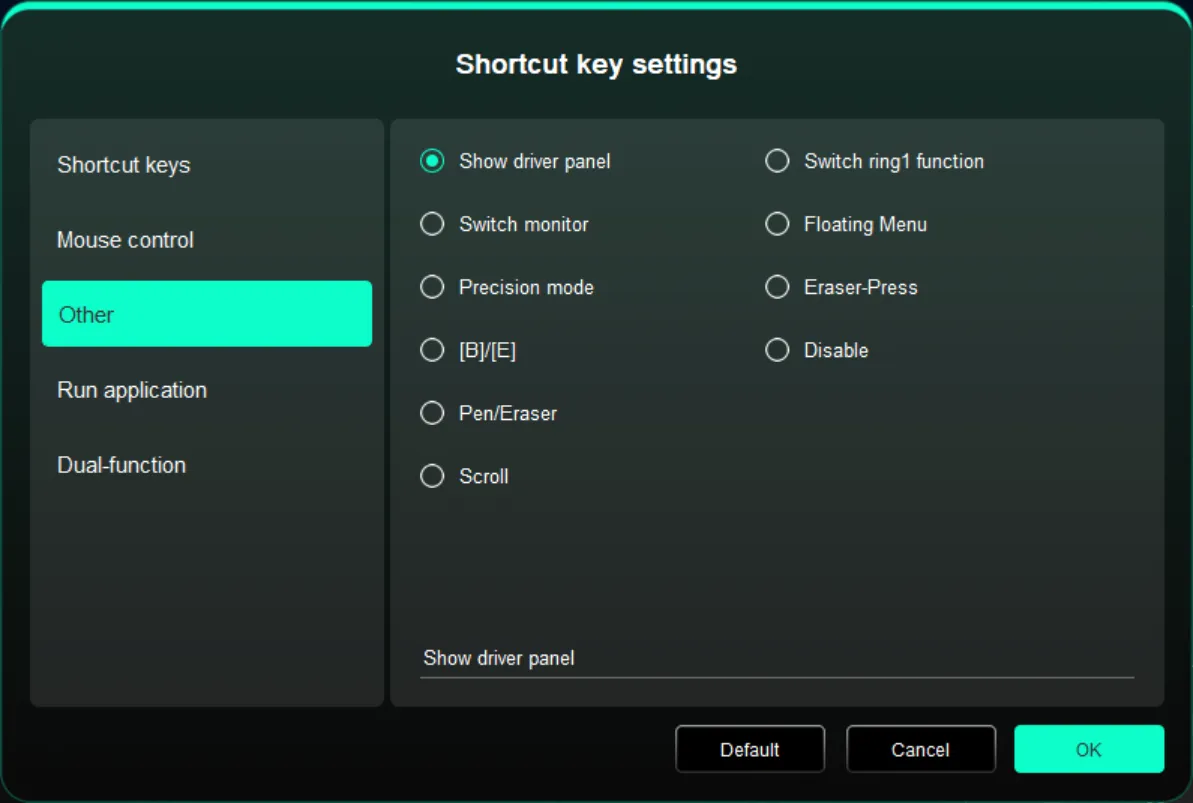
Other:
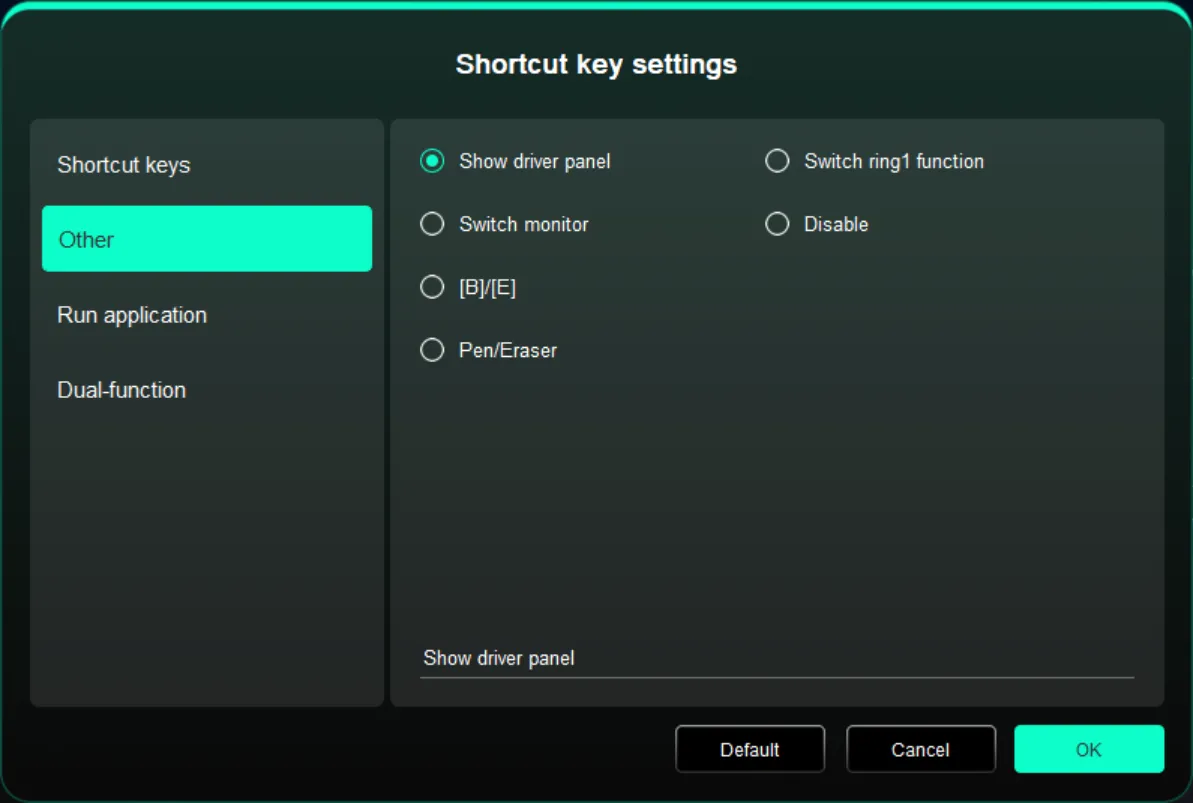
● Show Driver Panel: Quickly display the driver settings panel.
● Switch Monitors: When multiple monitors are connected, map the cursor to alternate monitors.
● [B]/[E]: Toggle between B/E key functions.
● Pen/Eraser: Toggle between Pen and Eraser modes.
● Switch Ring 1 Function: Switch the function of Roller 1.
● No Action: Perform no function.
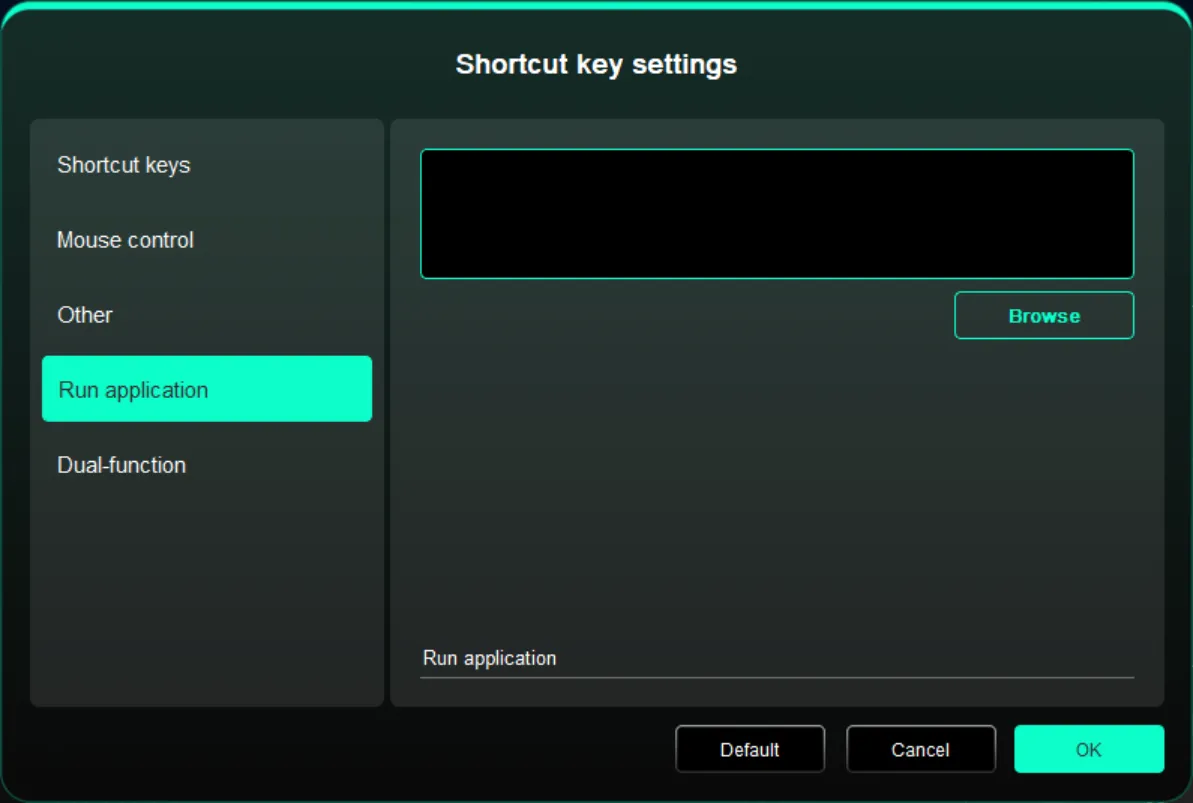
Run Application:
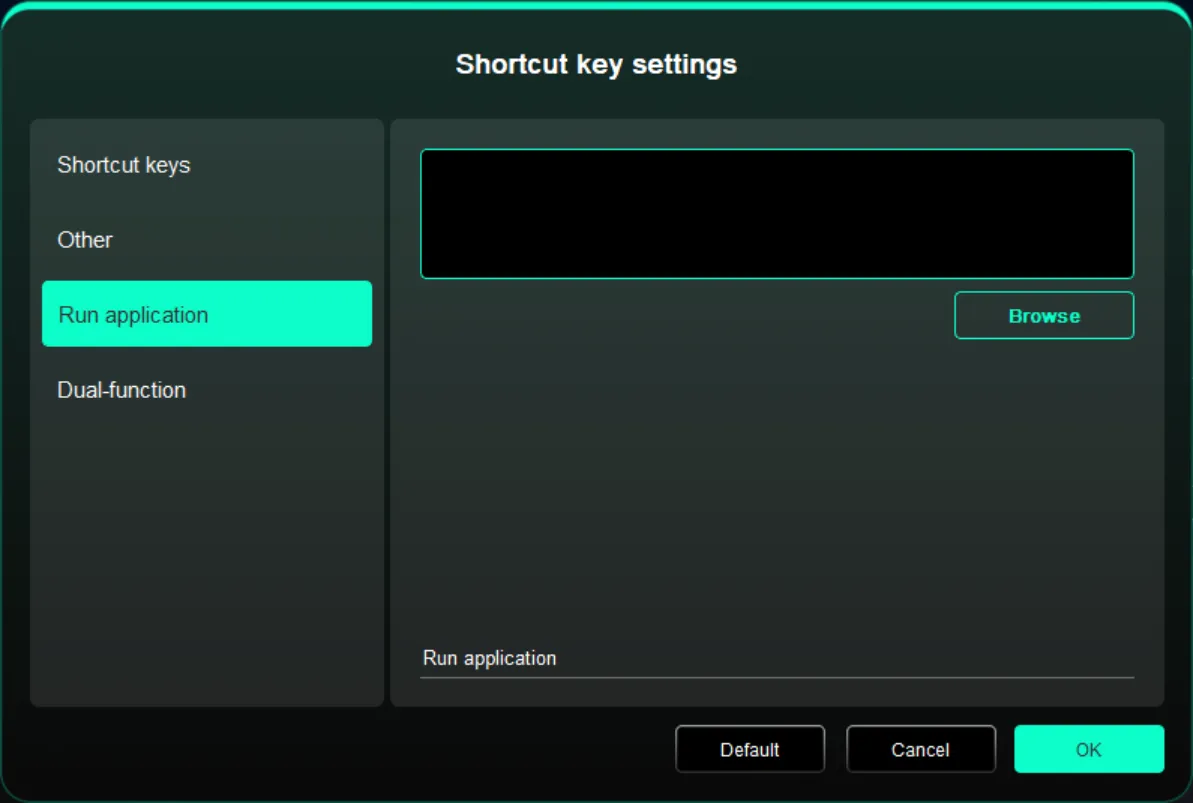
Quickly launch a selected application via the shortcut.
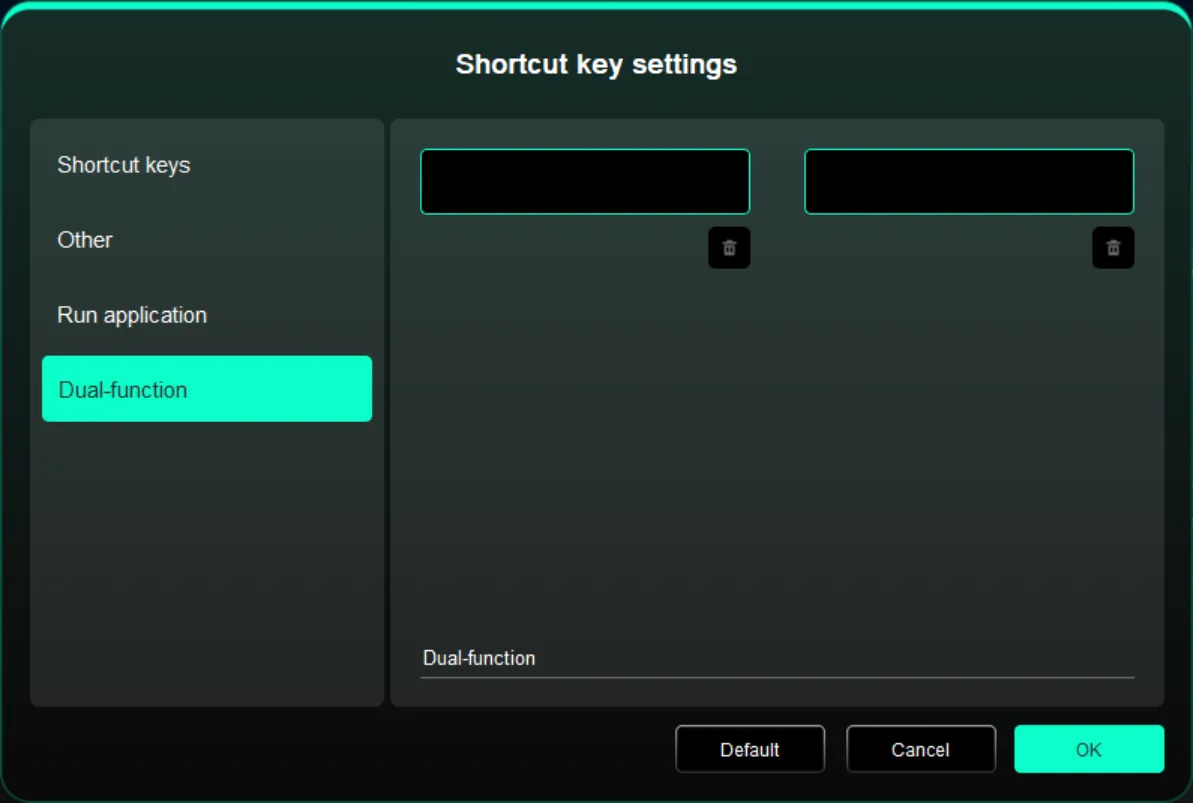
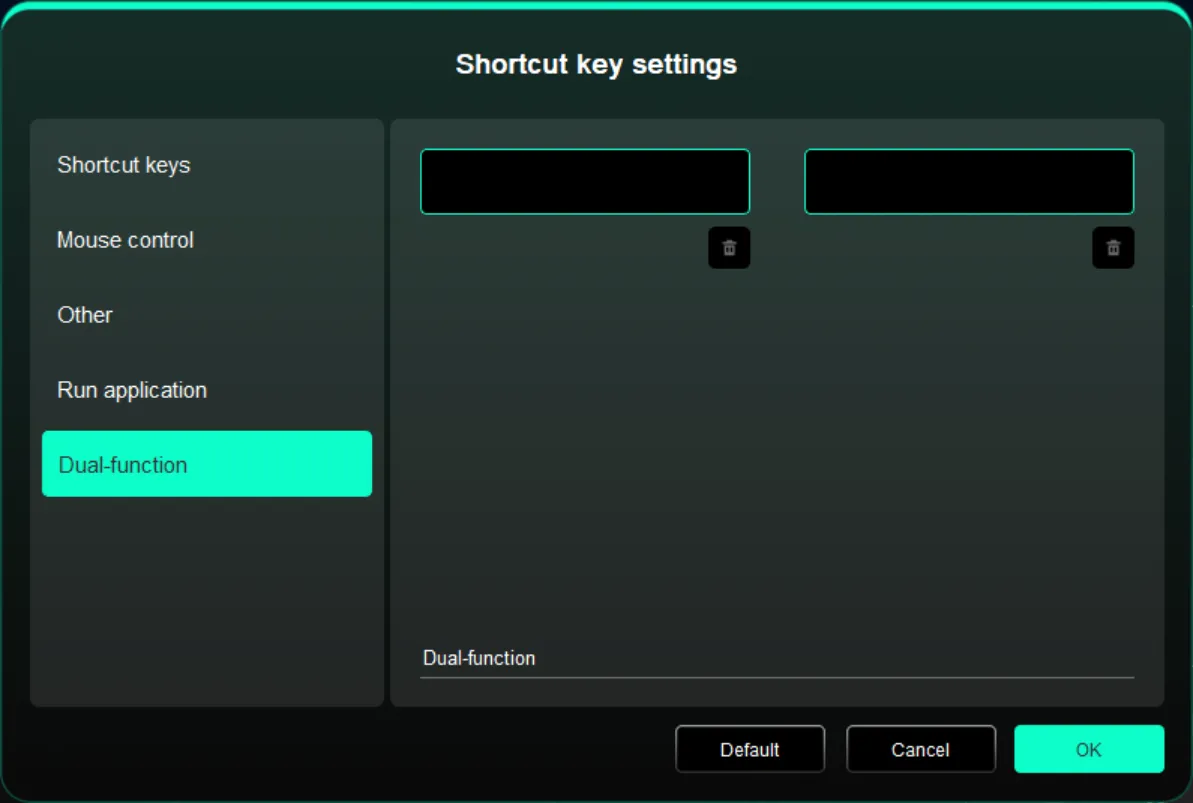
Dual Function:
Click a single shortcut to toggle between two functions, e.g., B/E. Both left and right can be single groups (including combination keys). Custom input via keyboard is supported, including Win, Cmd, and their combinations.
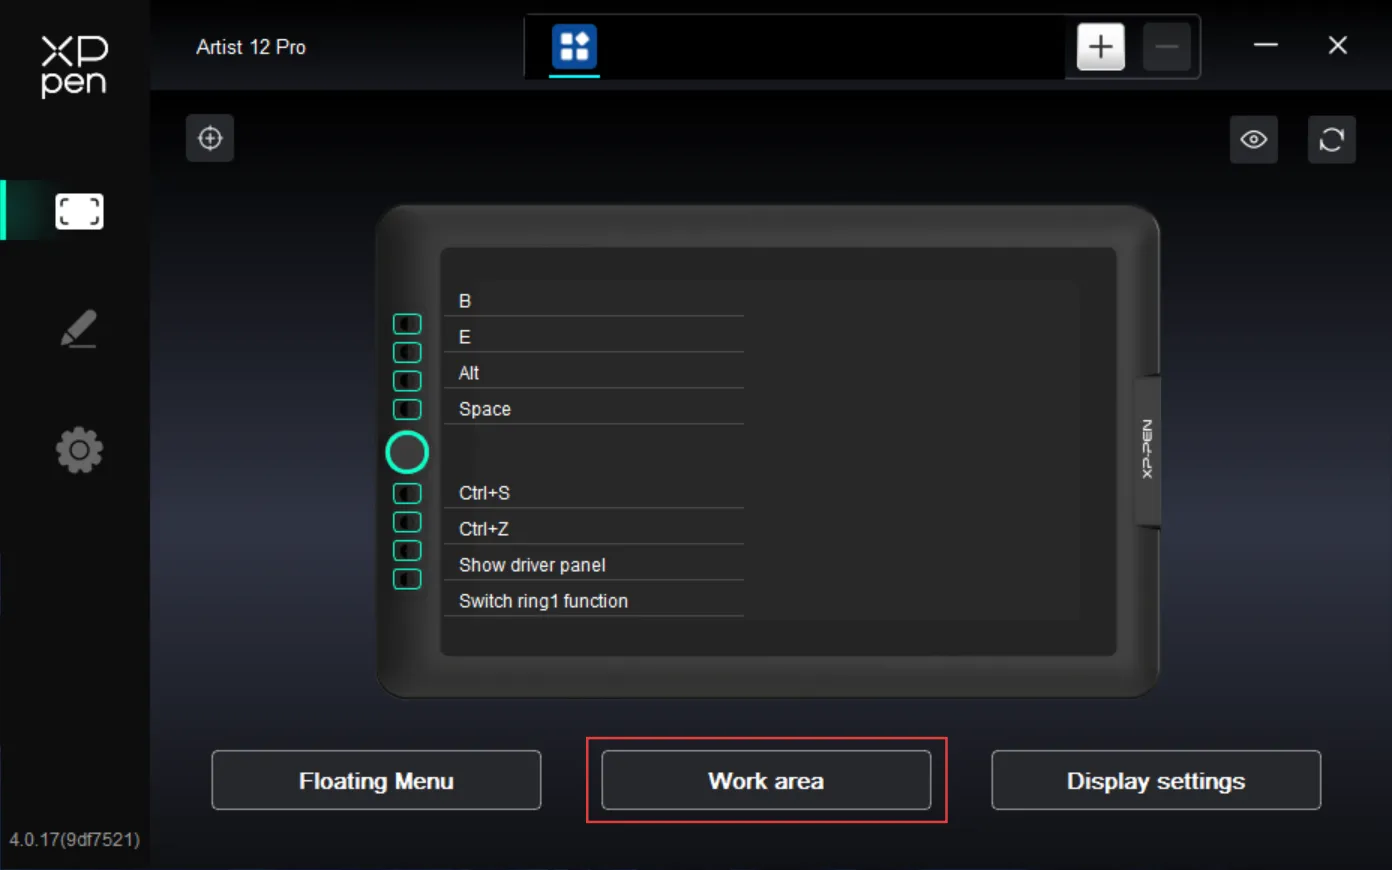
Work Area
Define the mapping relationship between the device work area and the screen display area.
Screen
Configure the mapping relationship between the current display area and the device.
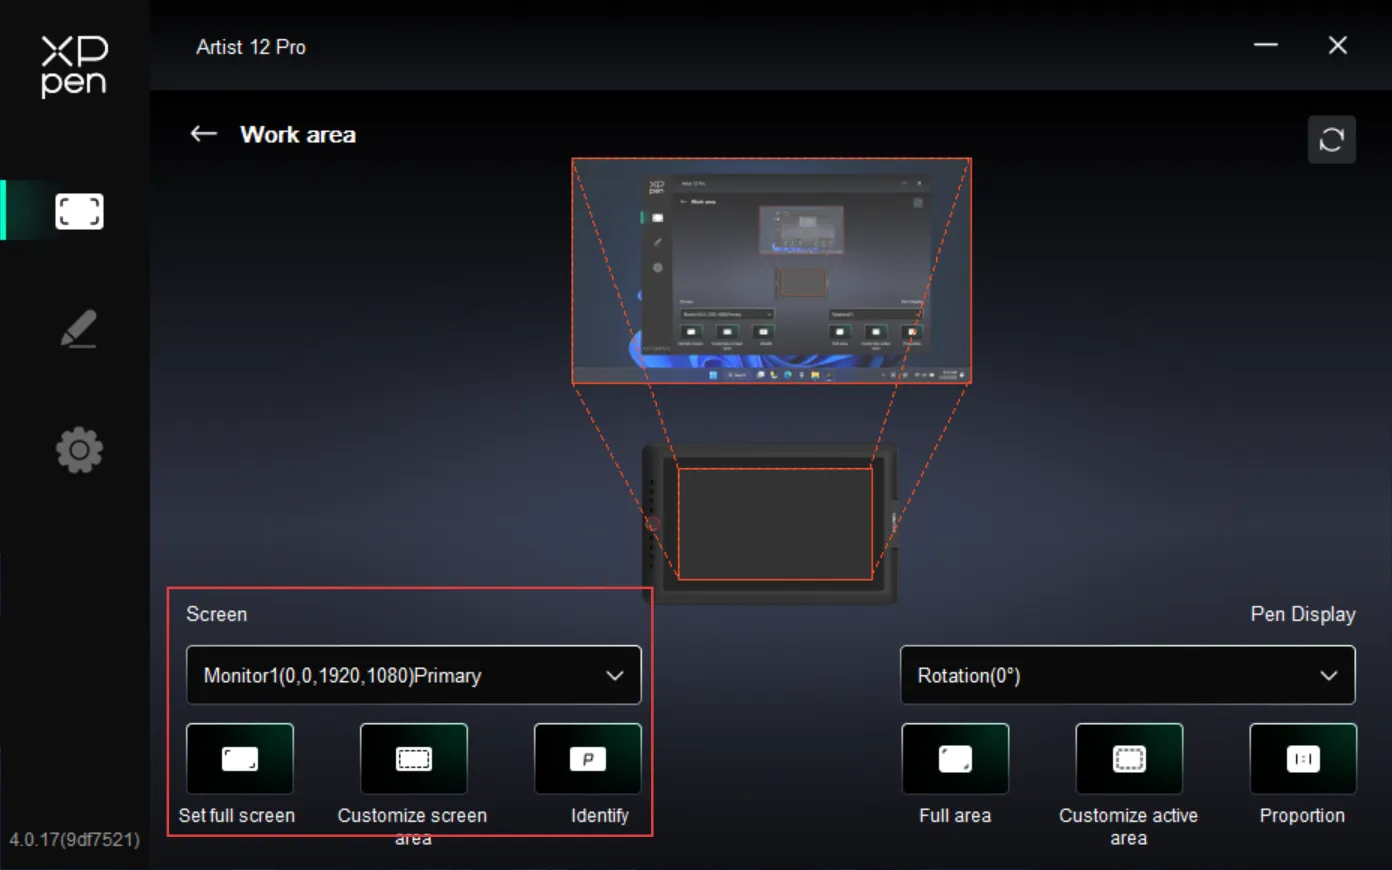
If you are using multiple monitors in Clone mode, the device work area will be mapped to all monitors simultaneously. When the stylus moves within the device work area, the cursor will move on all monitors.
If you are using multiple monitors in Extend mode, select which monitor the device work area should map to under the Screen tab.
Set the display mapping area:
1. Full Screen: The entire area of the selected monitor.
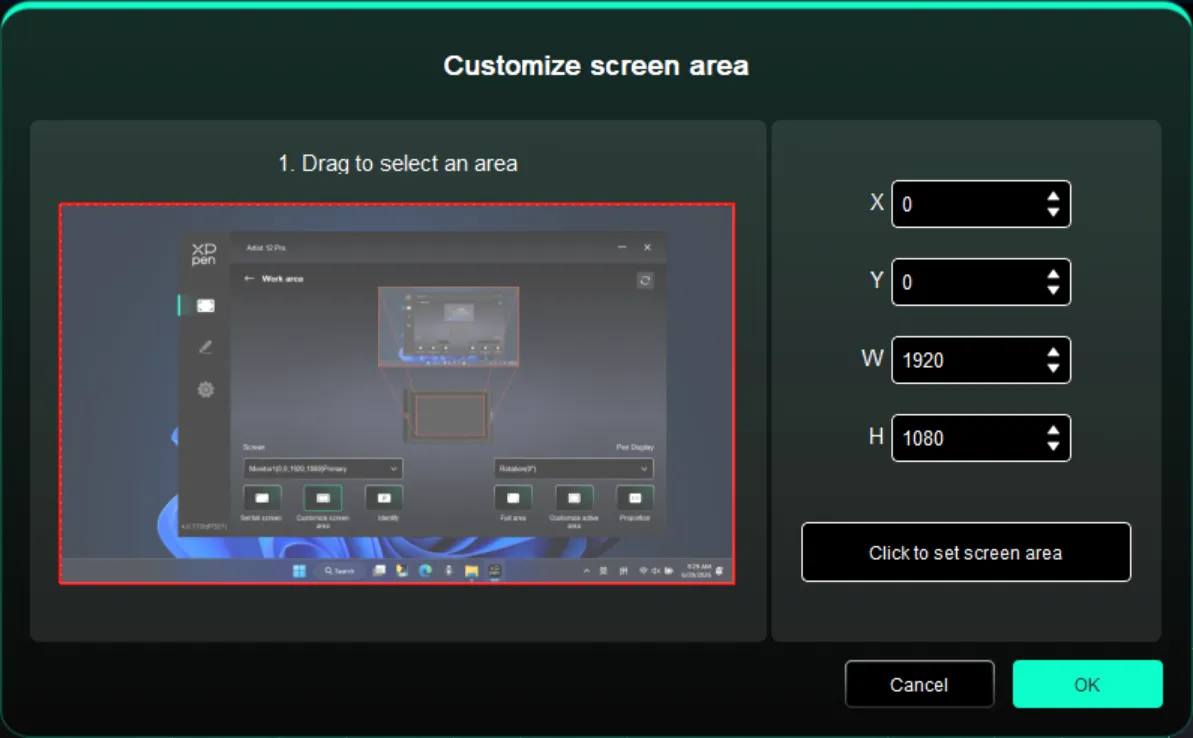
2. Custom Screen Area: Three methods:
● Drag to Select: Drag the cursor from one point to another on the Screen diagram.
● Coordinates: Enter coordinates in the X, Y, W, H input fields.
● Click to Set Screen Area: After clicking, tap the "top-left" and "bottom-right" positions on the monitor.
Screen Identification
Identify all connected monitors. A numeric identifier will appear in the lower-left corner of each monitor.
Pen Display
Configure the work area of your drawing display.
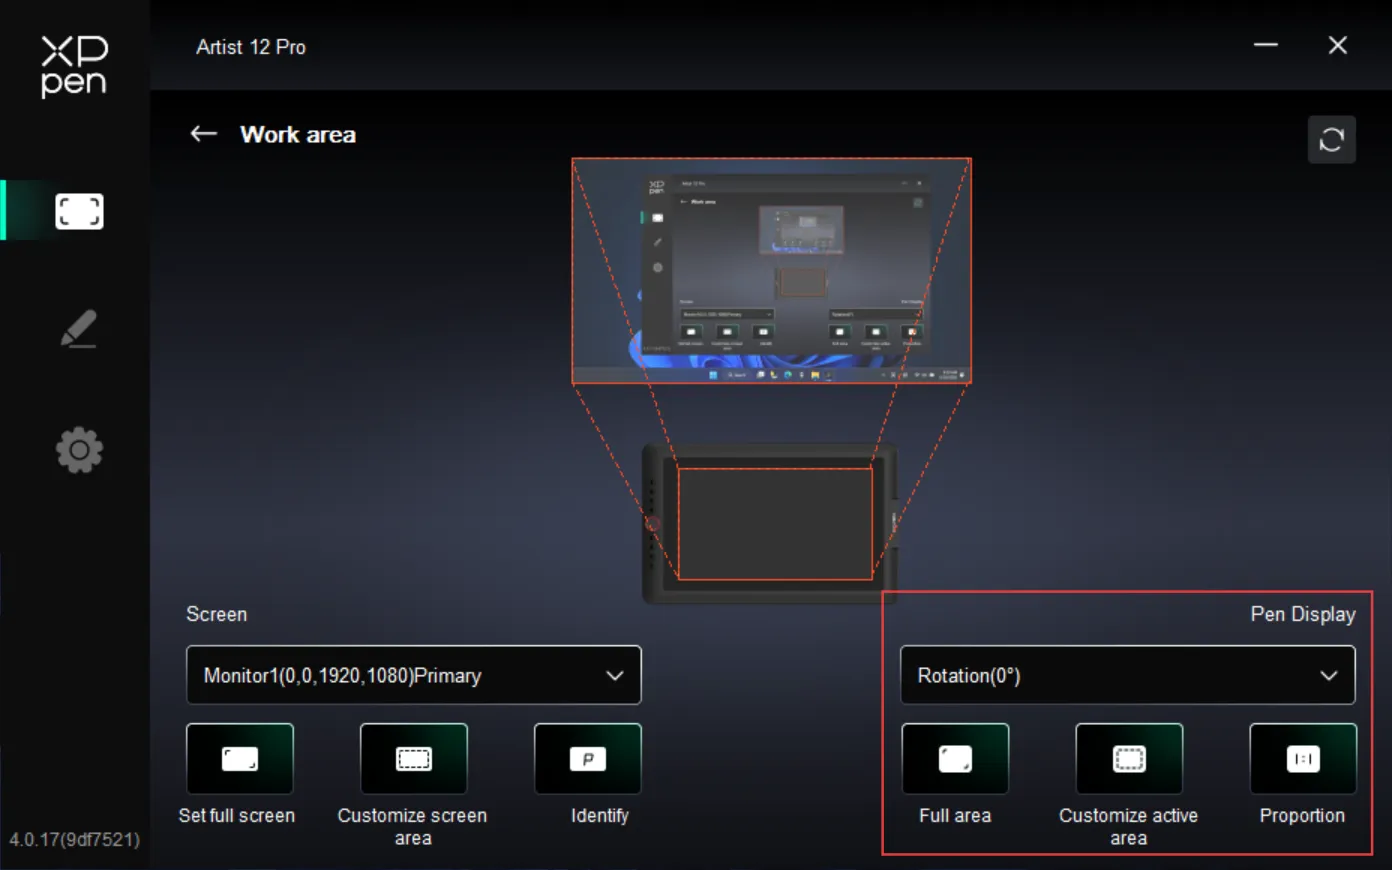
Set the device work area:
1. Full Active Area: The entire work area of the device.
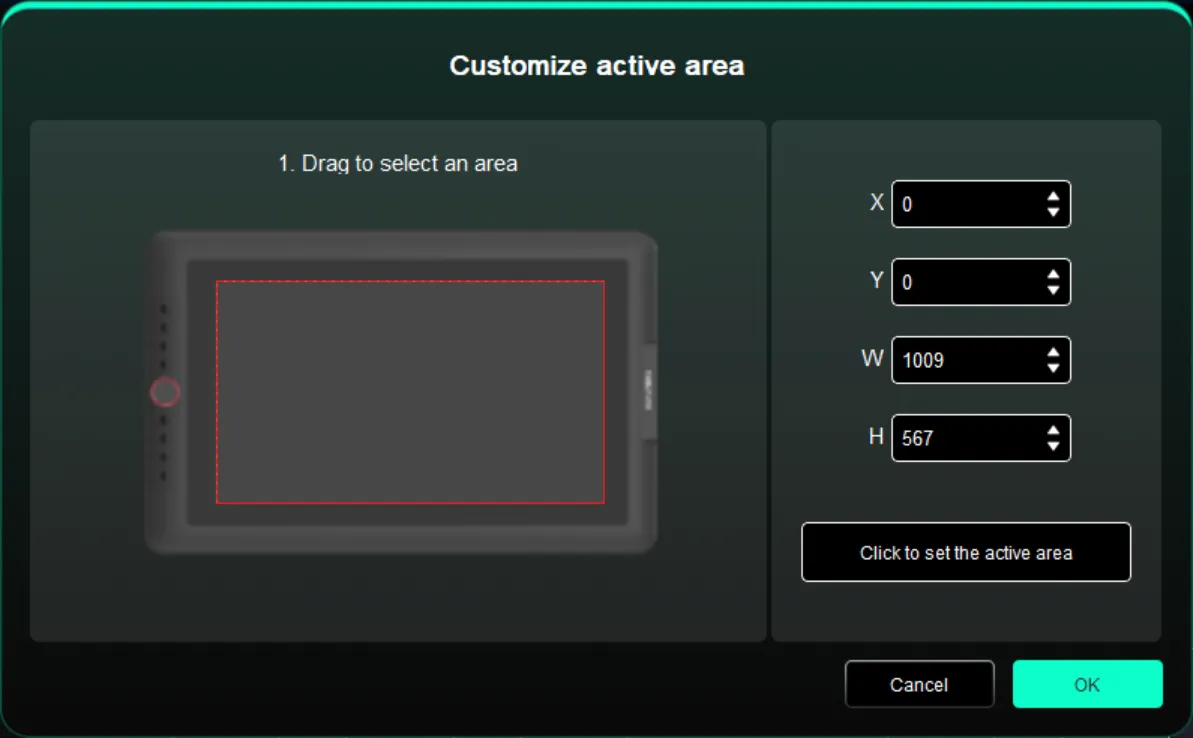
2. Custom Active Area: Three methods:
● Drag to Select: Drag the cursor from one point to another on the Device diagram.
● Coordinates: Enter coordinates in the X, Y, W, H input fields.
● Click to Set Active Area: After clicking, use the stylus to tap the "top-left" and "bottom-right" positions on the device work area.
3. Screen Ratio: Make the device work area proportional to the entire display area of the selected monitor.
4. Rotation: Rotate the product clockwise by 0° (Right-Hand Mode), 90°, 180° (Left-Hand Mode), or 270° for use.
Display Settings (Windows Only)
Configure color-related parameters of your drawing display.
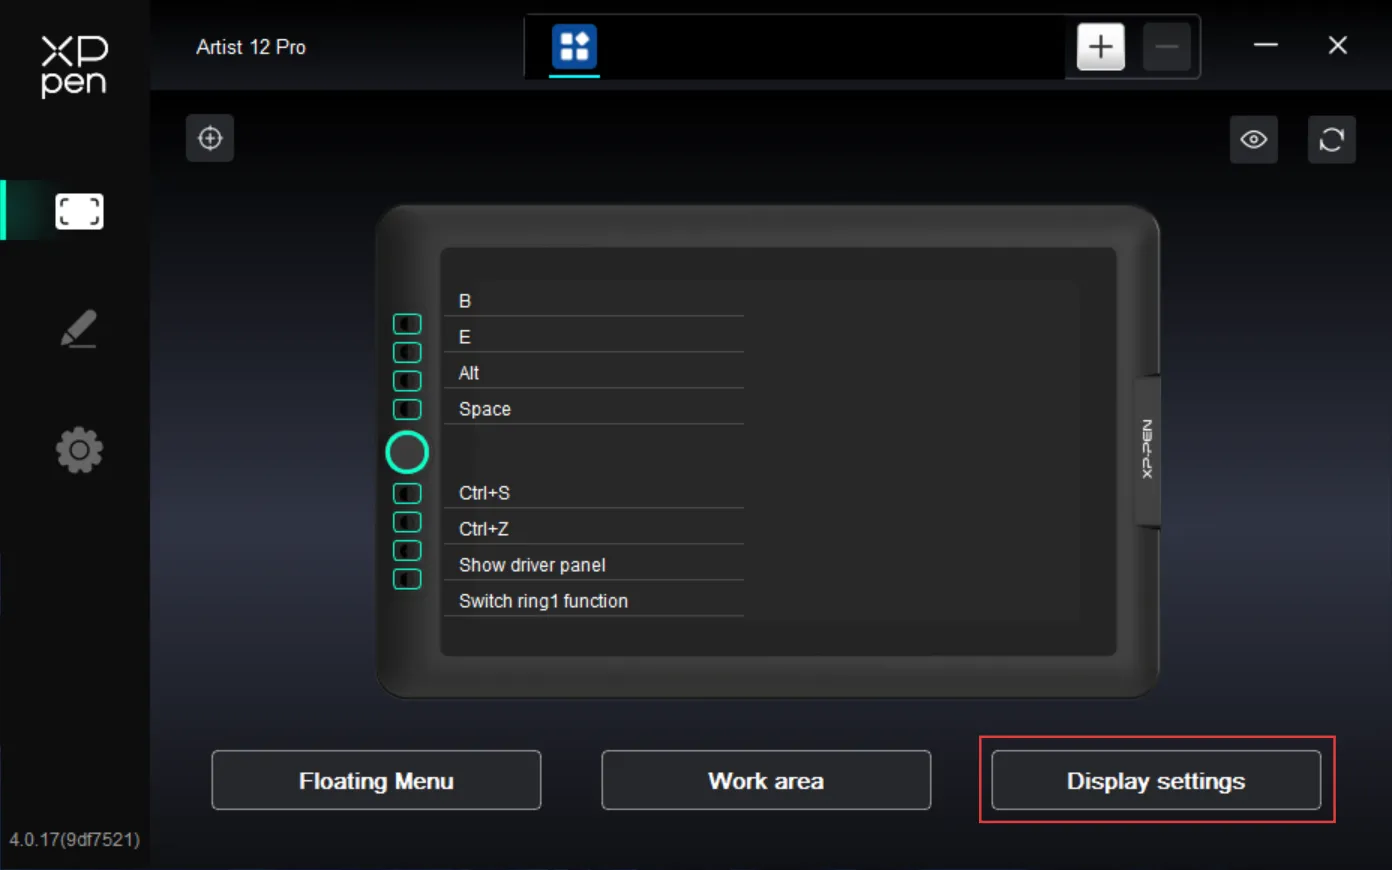
Brightness / Contrast: Drag the corresponding sliders to adjust the brightness or contrast of the device.
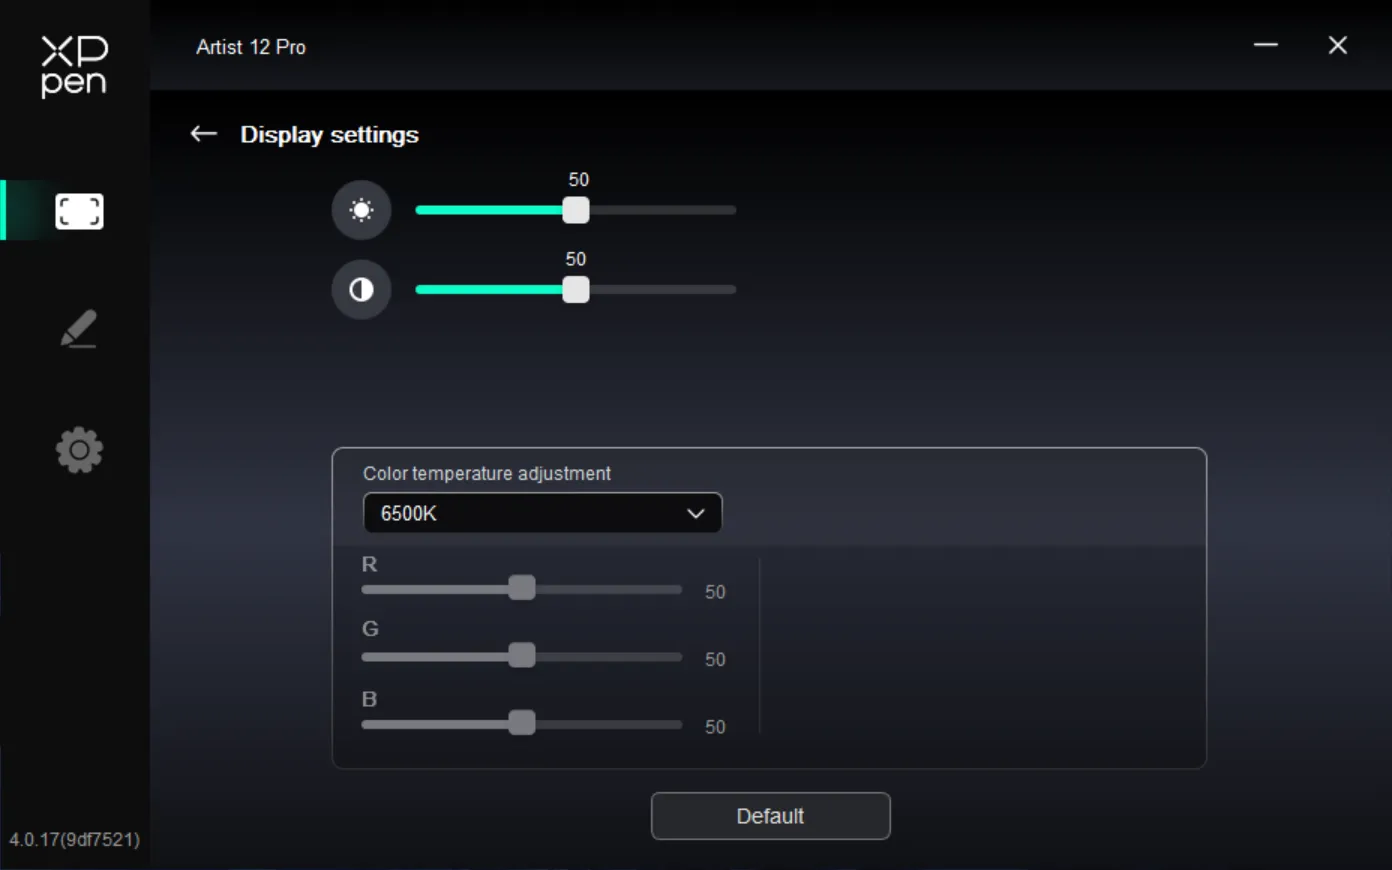
Color Temperature: The driver provides five modes: 5000K, 6500K (default), 7500K, 9300K, and USER. In USER mode, you can customize the color temperature by adjusting the R, G, and B values.
Stylus Settings
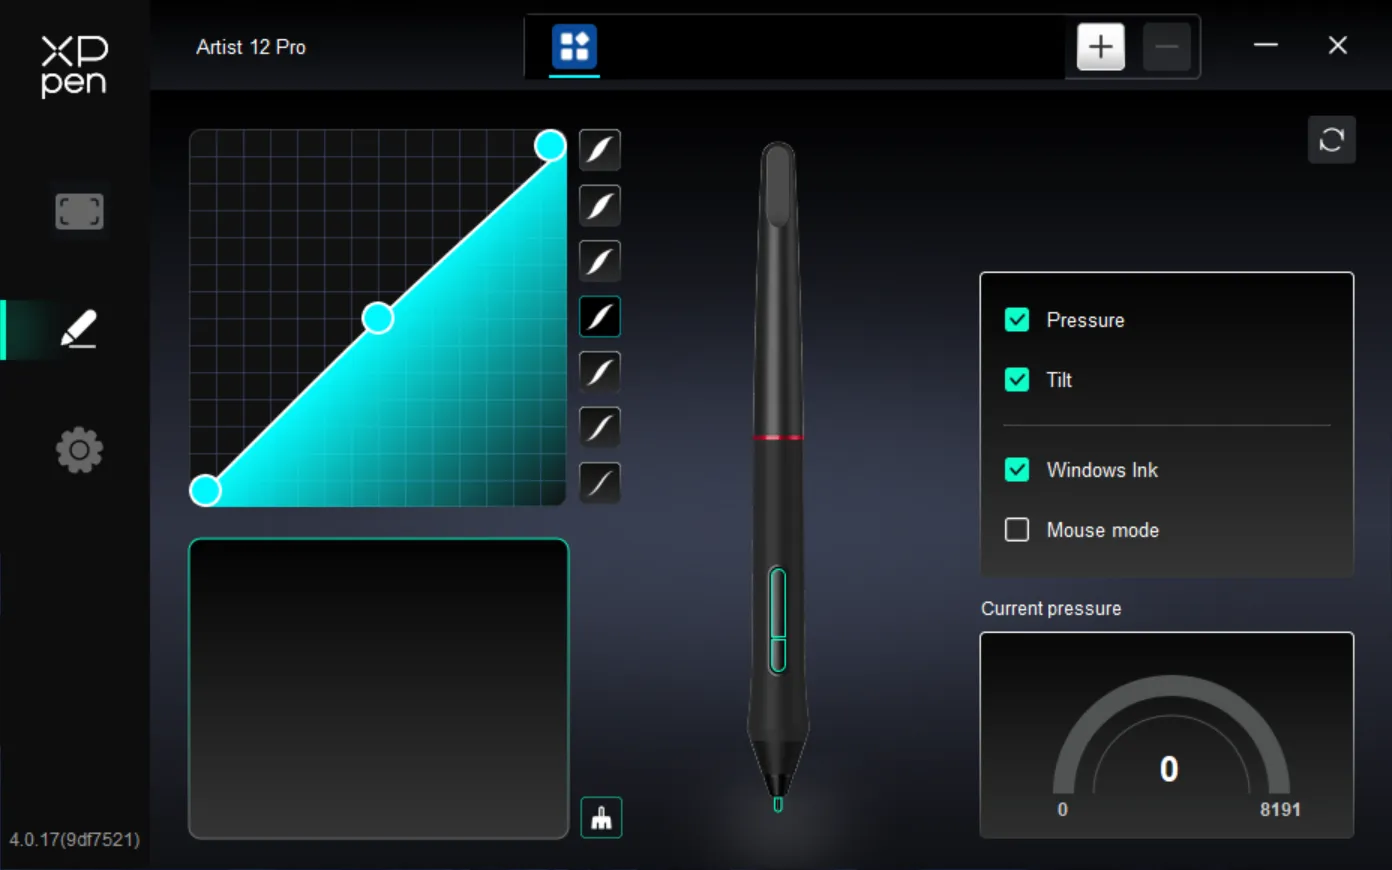
When the stylus is within the sensing range, it will be automatically detected and added to the driver.
Stylus Keys
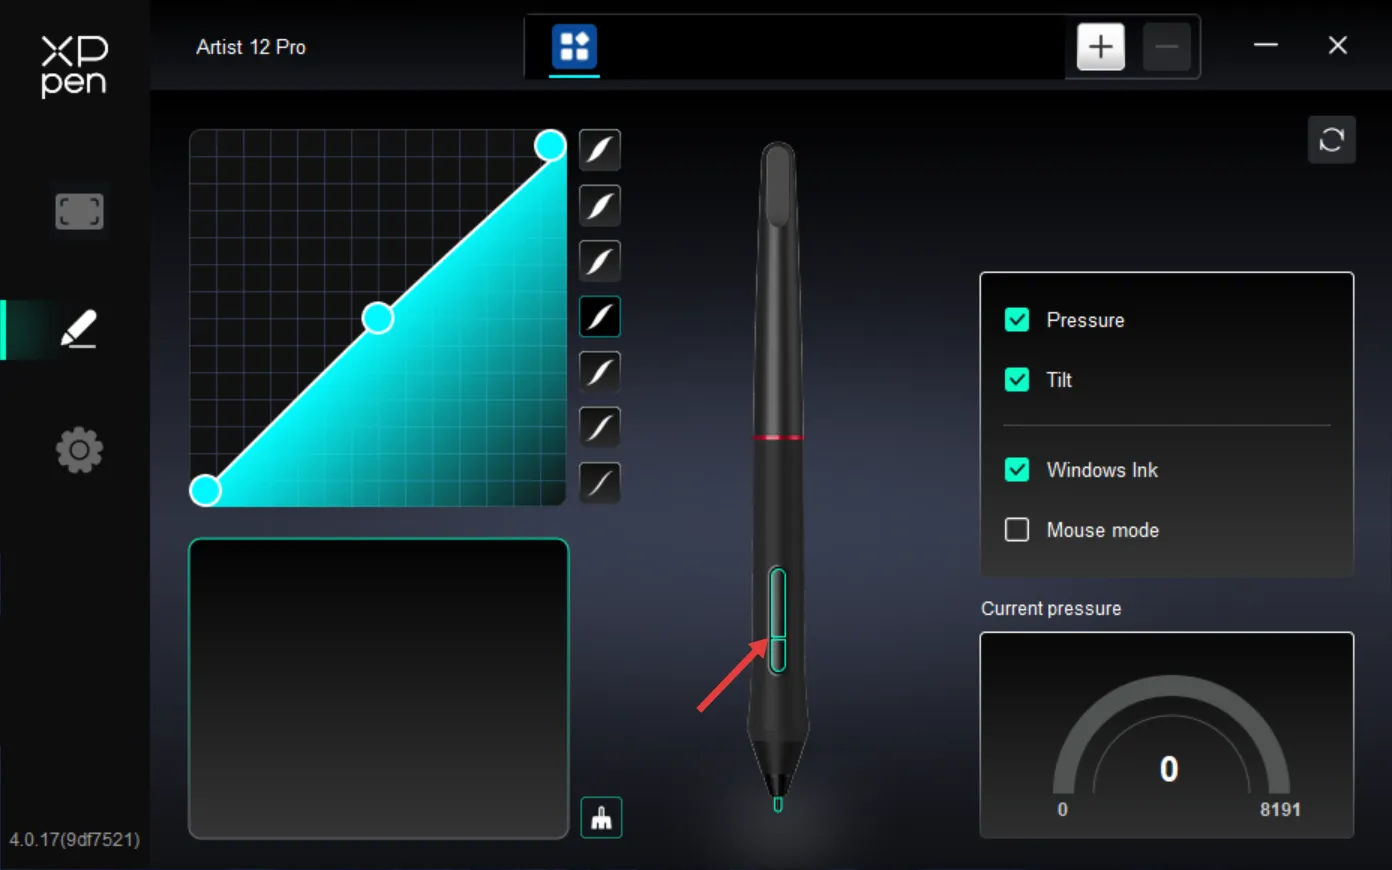
Click the stylus key on the diagram to customize its function.
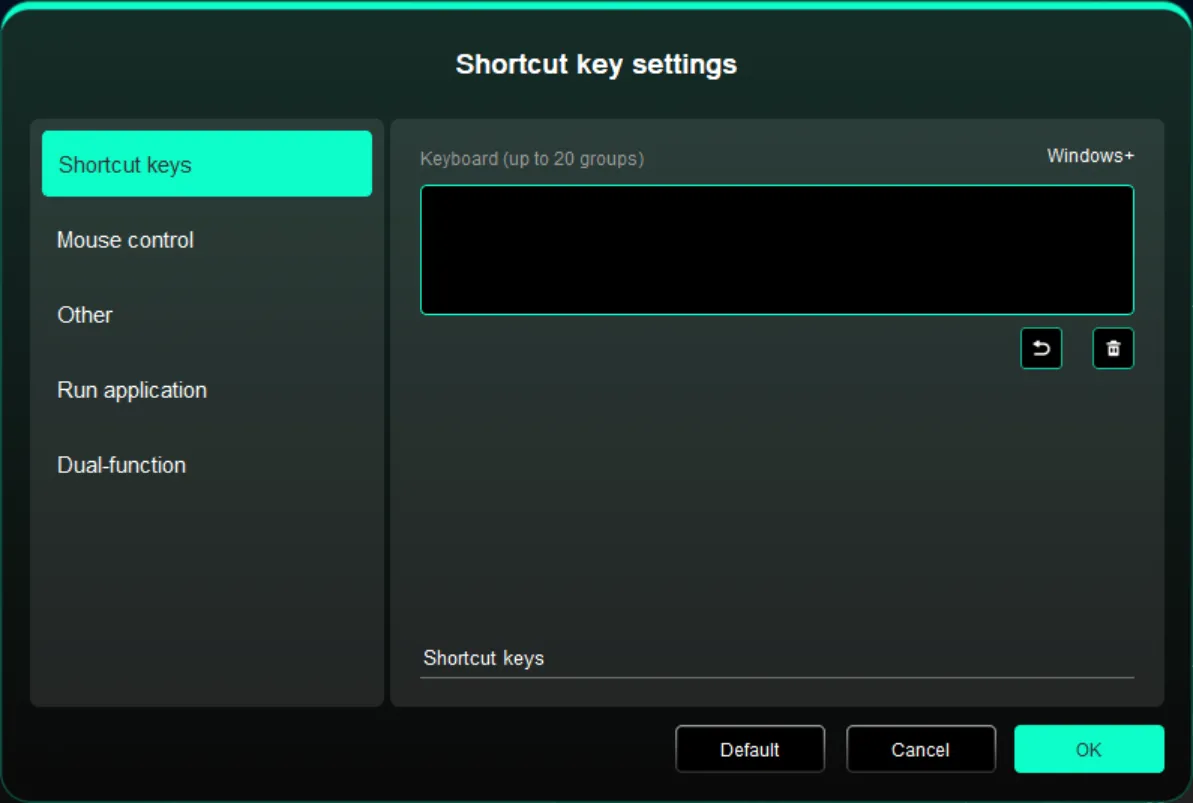
Shortcut Keys:
Configure a keyboard shortcut, e.g., set "Alt+A" in 3ds Max to use the Align tool.
Multiple keyboard shortcuts can be set in one group. For example, typing Ctrl+C, Ctrl+V will execute all configured shortcuts sequentially when the button is pressed.
Windows (Command): Add modifier key combinations. For example, to type Win(Cmd)+Shift+3, press Shift+3 and the driver will automatically add the system key.
Custom Name: Use the custom naming field at the bottom of the driver interface to assign a display name for the current function.
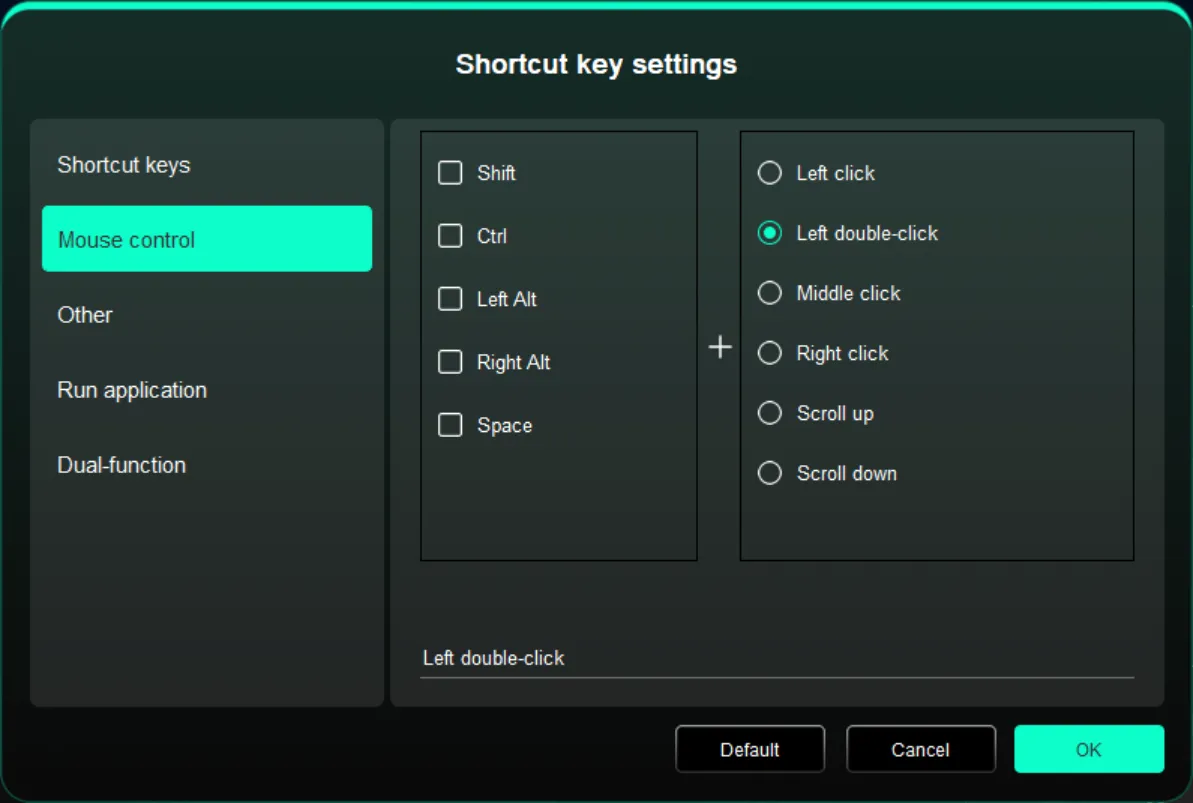
Mouse Control:
Configure mouse and keyboard combination keys. For example, selecting "Shift" and "Click" enables this shortcut in software that supports the combination.
Other:
● Show Driver Panel: Quickly display the driver settings panel.
● Switch Monitors: When multiple monitors are connected, map the cursor to alternate monitors.
● Precision Mode: Restrict the active display area to a defined range for more detailed drawing within that area.
● [B]/[E]: Toggle between B/E key functions.
● Pen/Eraser: Toggle between Pen and Eraser modes.
● Scroll: Hold the assigned button and use the pen to scroll.
● Switch Ring 1 Function: Switch the function of Roller 1.
● Floating Menu: Invoke the Floating Menu.
● Eraser - Hold: Hold the button to switch to Eraser mode; release to restore the original function.
● No Action: Perform no function.
Run Application:
Quickly launch a selected application via the shortcut.
Dual Function:
Click a single shortcut to toggle between two functions, e.g., B/E. Both left and right can be single groups (including combination keys). Custom input via keyboard is supported, including Win, Cmd, and their combinations.
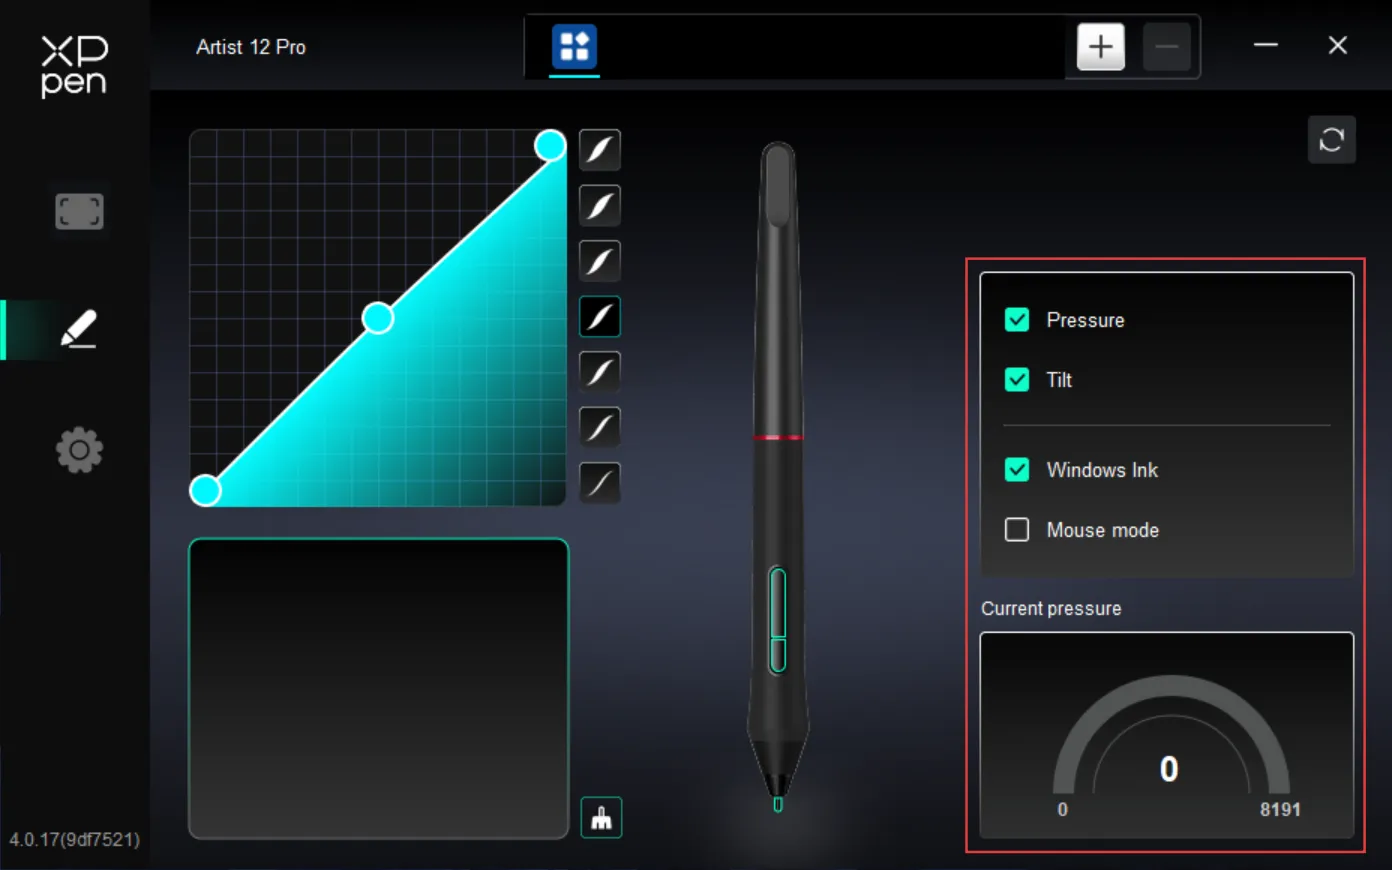
Pressure Sensitivity
Adjust the pen pressure curve or select a preset pressure option.
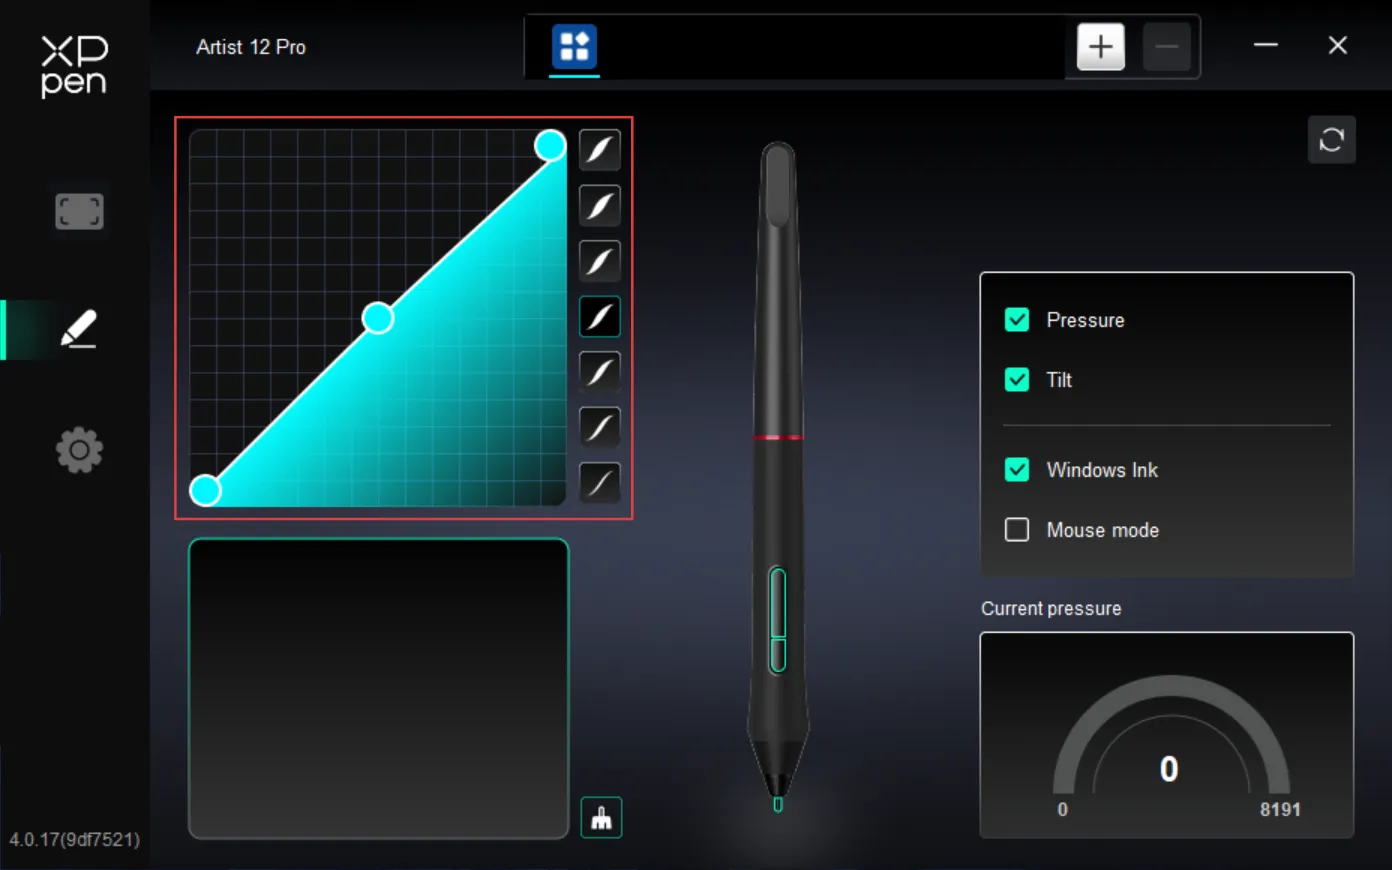
Pressure:
When turned off, you will not feel the applied stylus pressure while using the stylus.
Tilt:
When turned off, the stylus tilt effect will be disabled.
Windows Ink (for Windows Only):
Windows supports stylus handwriting input. If you need handwriting functionality in software such as Microsoft Office/Whiteboard, do not disable this option.
Mouse Mode:
When the stylus is lifted, the cursor stays at the position where you left it, operating like a mouse. When selected, you can adjust the cursor movement speed on the device. When unselected, Stylus Mode is used by default.
Current Pressure:
Test the stylus pressure you are currently applying.
Applications
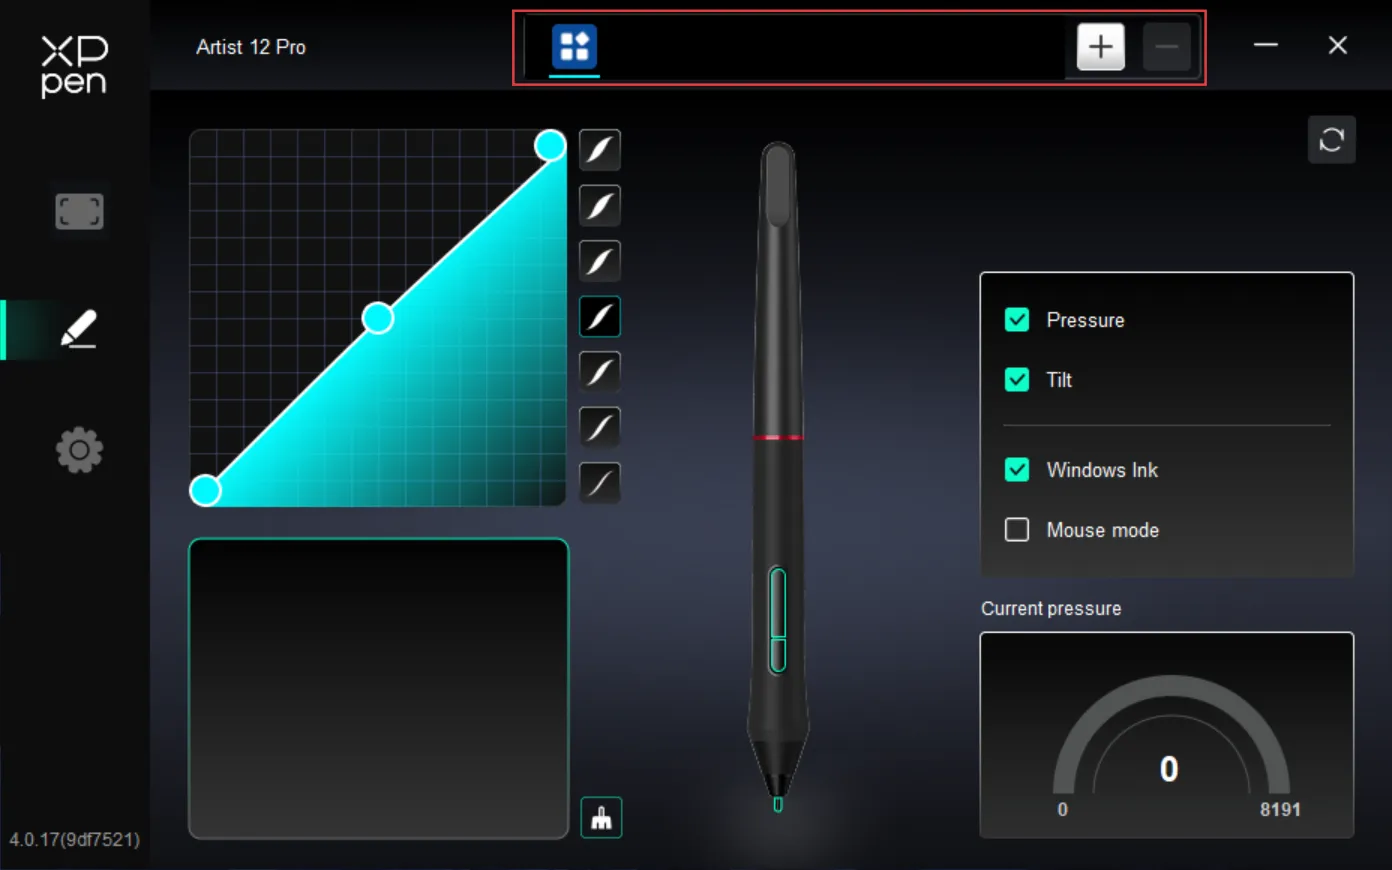
Add an application to the application list and select it to customize the stylus key function for that specific application.
For example, if you select an application and change its configuration, the changes will only take effect when using that application. When switching between different applications, the driver will automatically recognize the change. Up to 7 applications can be added.
To add an application, follow these steps:
1. Click the "+" icon at the top-right of the application bar to open the application selection page.
2. Select the desired application from the list of currently running applications, or click "Browse" to choose from installed applications.
3. Click "OK", and the selected application will be added to the application bar.
4. After selecting an added application, click the "-" icon behind the application bar to delete it.
5. When "All Other Applications" is selected, the configured functions will apply to all applications that have not been individually customized.
Driver Settings
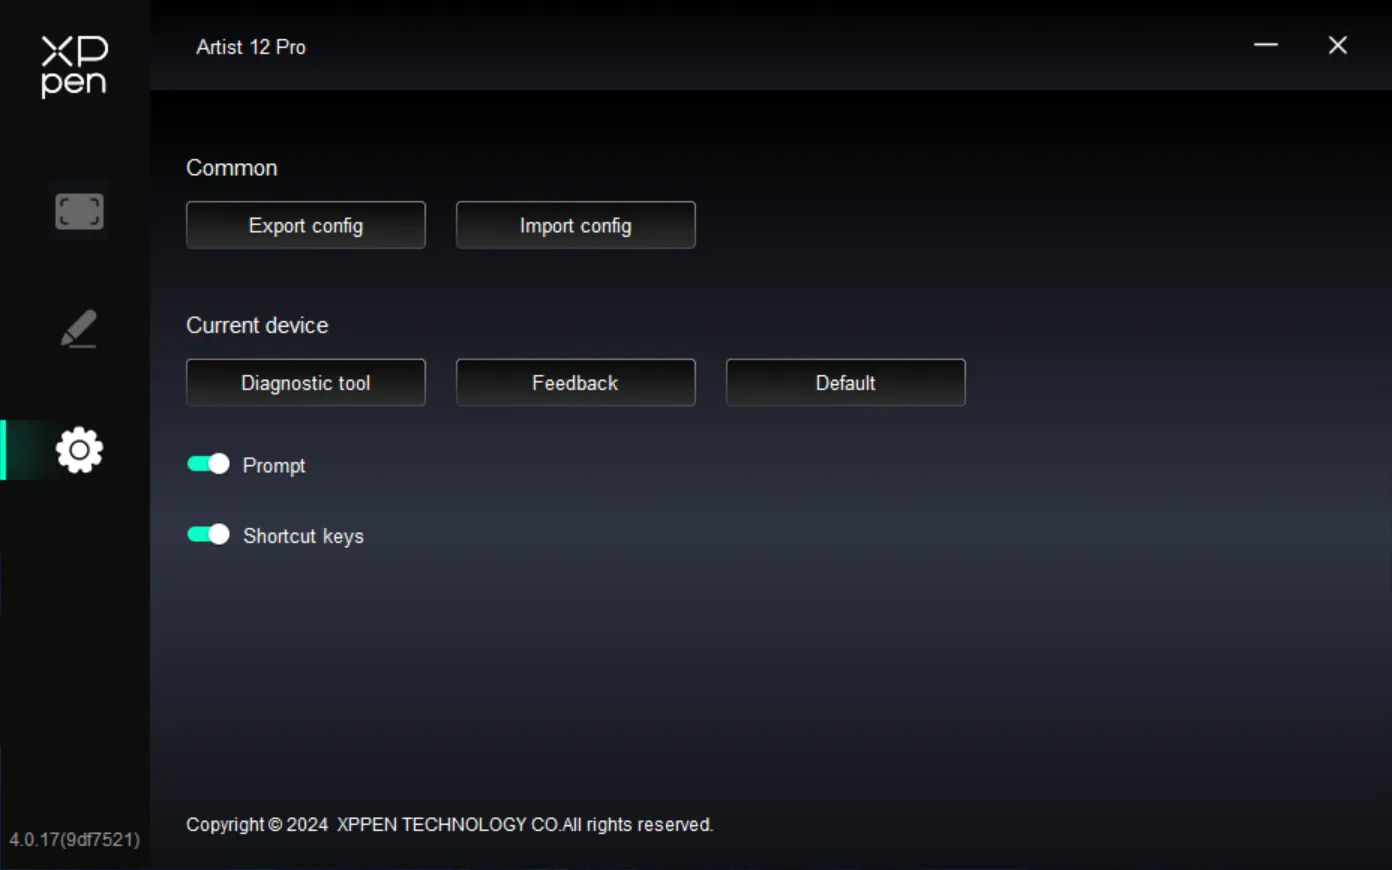
Import/Export Profiles:
Use the Import/Export feature to load or save your profile settings. This feature is only supported on the same operating system.
Diagnostic Tool:
Use the diagnostic tool when issues arise during driver usage.
Feedback:
If you have any questions or suggestions regarding the driver, you can send them to us via this page.
Restore Default:
Restore all shortcut keys, work area, and display settings to their default values.
Prompt Information:
When turned off, key press prompts will not be displayed at the bottom of the screen when a button is pressed.
Shortcut keys:
When turned off, all device key functions will be disabled.
Driver Uninstallation
Windows
Open [Start] → [Settings] → [Apps] → [Apps & features], find "PenTablet", click it, select "Uninstall", and follow the prompts.
macOS
Go to [Go] → [Applications], find XPPen, click "UninstallPenTablet", and follow the prompts.
Linux
● DEB: Enter "sudo dpkg -r XPPenLinux" in the terminal and execute the command.
● RPM: Enter "sudo rpm -e XPPenLinux" in the terminal and execute the command.
● Tar.gz: Extract first, then enter "sudo" in the terminal, drag "uninstall.sh" into the terminal, and execute the command.
FAQ
The drawing display shows nothing or is a black screen.
● Check that the power is properly connected.
● Check that the connection cable is correct.
● Check that the power indicator is blue. If not, check the connection cable and restart the device.
● If the signal is unstable, check that the cable connections are secure.
The computer cannot recognize the device.
● Check whether the USB port you are using is functioning properly. If not, try another USB port.
The stylus does not work.
● Ensure you are using the original stylus that came with the device.
● Ensure the driver is installed correctly and check whether the stylus settings in the driver are normal.
Drawing software cannot detect stylus pressure, but the cursor can move.
● Check whether the drawing software supports stylus pressure.
● Download the latest driver installation file from the XPPen website and verify that stylus pressure is working correctly in the driver.
● Before installing the driver, close antivirus software and graphics applications.
● Before installation, uninstall drivers for other drawing displays.
● After installation, restart the computer.
● If stylus pressure is normal in the driver (Windows: ensure Windows Ink is enabled in the Stylus settings of the driver), launch the drawing software and test again.
Cursor offset.
● Verify the driver mapping.
● Use the driver to calibrate the stylus.
Drawing experiences lag or stuttering.
● Check whether your computer configuration (CPU & GPU) meets the recommended requirements of the installed drawing software, and optimize related functions by referring to the FAQ published on the drawing software's official website.

The terms HDMI, HDMI High-Definition Multimedia Interface, HDMI trade dress and the HDMI Logos are trademarks or registered trademarks of HDMI Licensing Administrator, Inc.
If you need any product-related assistance, please contact us:
Email: service@xp-pen.com
Website: www.xp-pen.com