Getting started with your
XPPen Artist Ultra 16
Follow these steps to start creating on your
XPPen Artist Ultra 16.
Follow these steps to set up your XPPen Artist Ultra 16.


1.Computer Connection
You can choose one of the following two connection modes depending on the configuration of your computer:
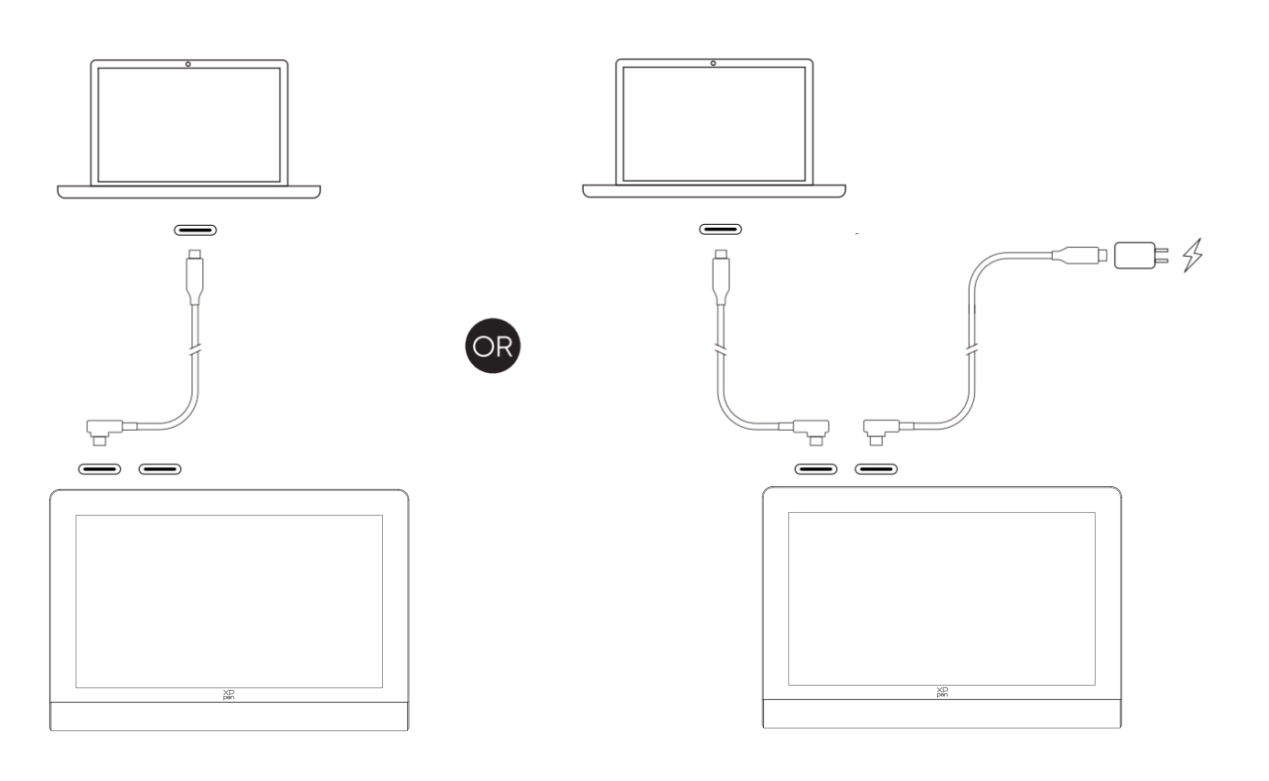
Mode 1: Connect to a computer with a USB-C port that supports DisplayPort output
Mode 1: Connect to a computer with a USB-C port that supports DisplayPort output
1.Use a USB-C to USB-C cable to connect your computer to the drawing display;
2.If the display remains unlit, please use a second USB-C cable to connect the drawing display to the power adapter for power supply.
Note: Due to computer power output limitations, when connected via a single USB-C to USB-C cable, the product may not reach maximum brightness and may experience display flickering or blackouts. At this time, please use a second USB-C cable to connect the drawing display to the power adapter for power supply.
Mode 2: Connect to a computer with USB-A and HDMI ports
1.Plug the HDMI and USB-A connectors of the 3-in-1 cable into your computer;
2.Plug the USB-C connector of the 3-in-1 cable into the drawing display;
3.Connect one end of the second USB-C to USB-C cable to the USB-C power supply port of the 3-in-1 cable. Or connect one end directly to another USB-C port of the drawing display, and the other end to the PD power adapter for power supply.
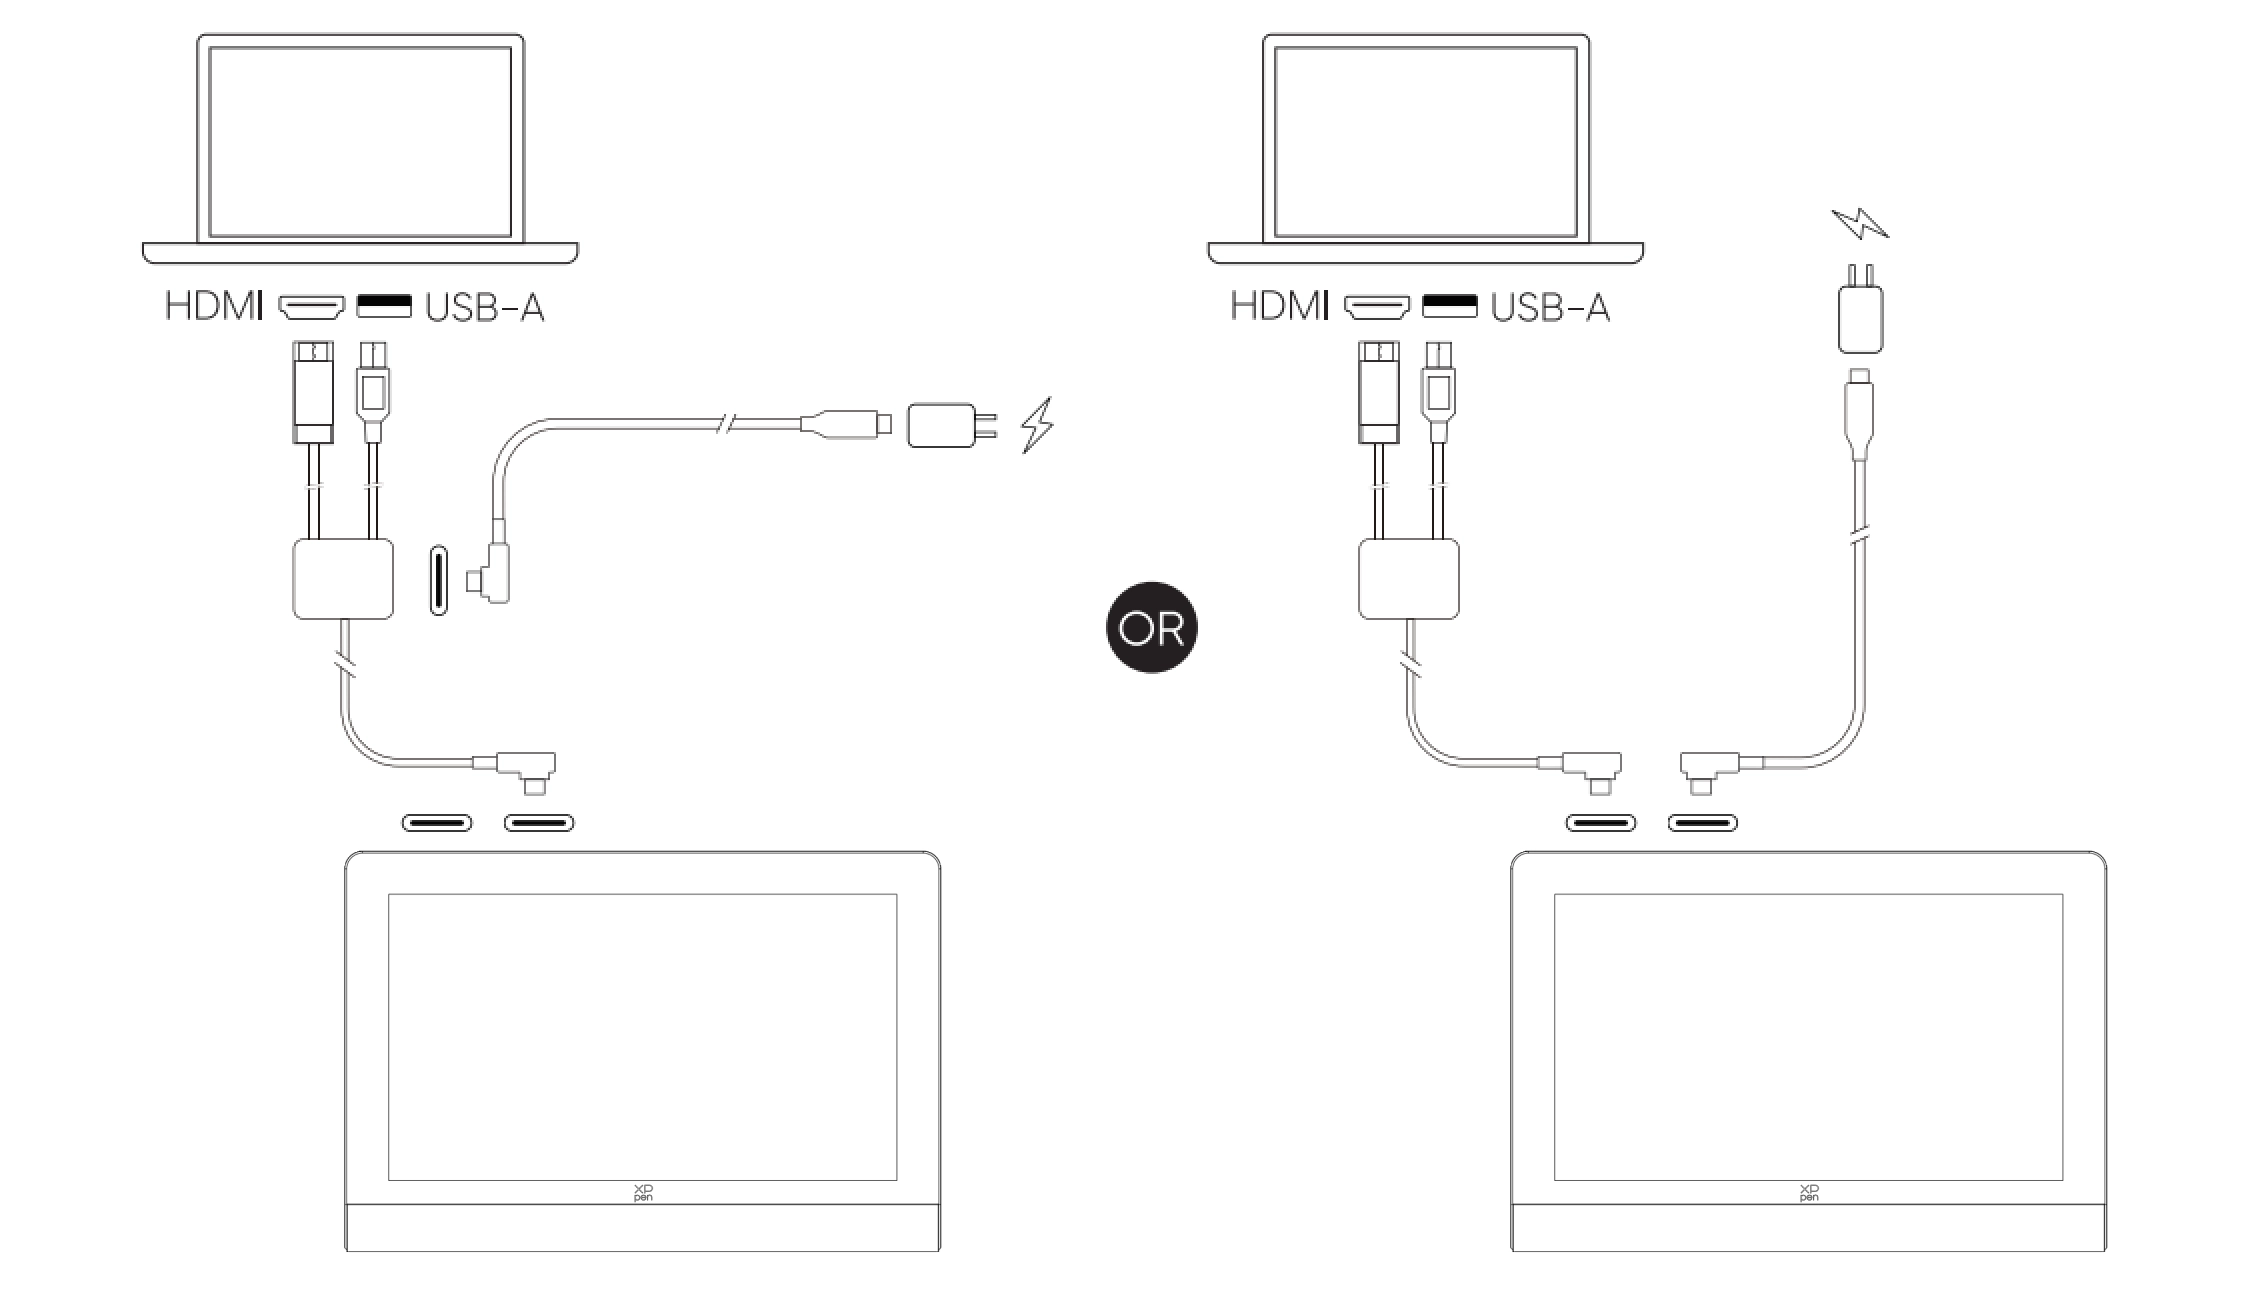
* It is recommended to prioritize using the dedicated HDMI port on your computer's discrete graphics card (if available).
2.Android Phone or Android Tablet Connection
1.Use a USB-C to USB-C cable to connect your phone/tablet to the drawing display;
2.Use another USB-C cable to connect the drawing display and power adapter.
2.Use another USB-C cable to connect the drawing display and power adapter.

* It is recommended to use a mobile phone that supports Desktop Mode for connection. For compatible mobile phone models, please refer to the official website.
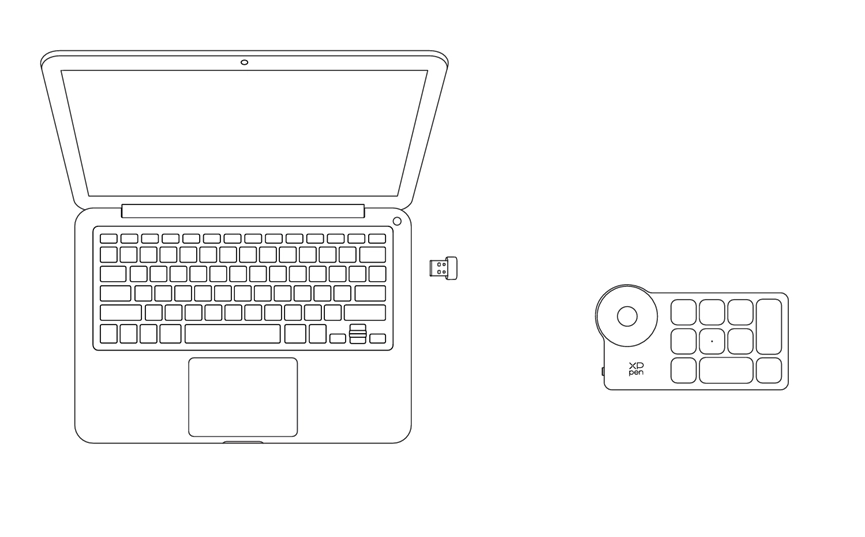
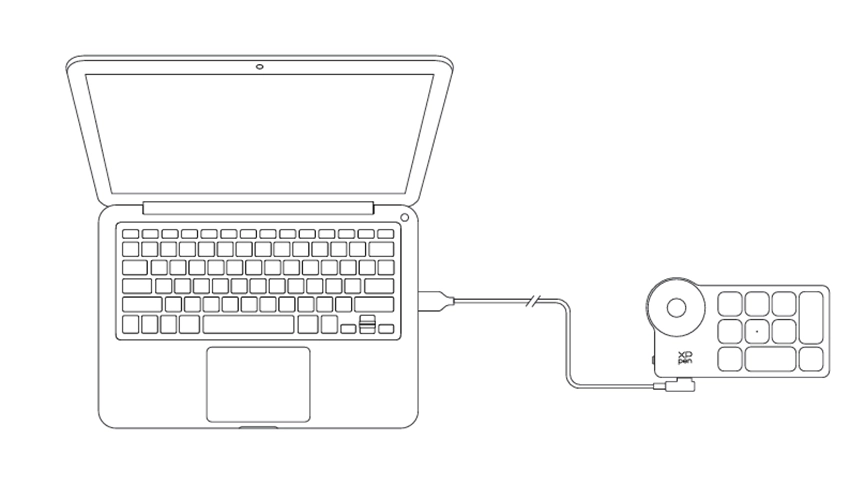
3.Wireless Shortcut Remote Connection
1.Wired Connection
Connect a USB-C to USB-A or USB-C to USB-C cable to your computer and device.
Connect a USB-C to USB-A or USB-C to USB-C cable to your computer and device.
2.Bluetooth Receiver Connection
Insert the Bluetooth receiver into your computer. Toggle the power switch of the wireless shortcut remote. Then the indicator light illuminates solid blue for 30 seconds before turning off.
Insert the Bluetooth receiver into your computer. Toggle the power switch of the wireless shortcut remote. Then the indicator light illuminates solid blue for 30 seconds before turning off.
3.Bluetooth Wireless Connection
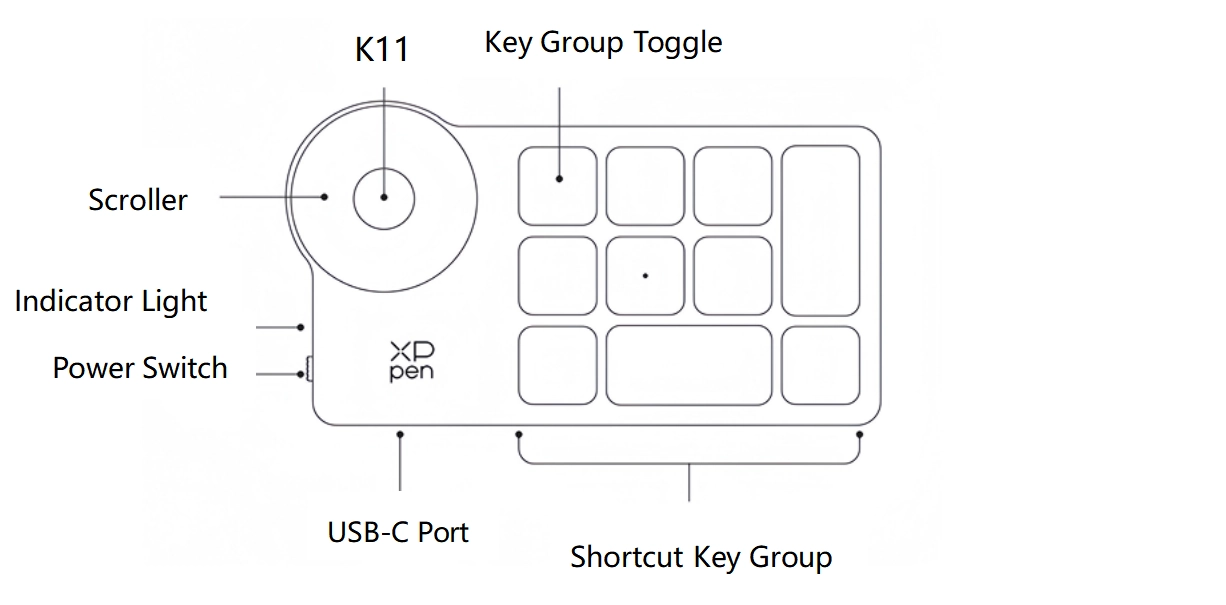
a.Toggle the power switch of the wireless shortcut remote. The indicator light of the wireless shortcut remote blinks blue slowly. Then press and hold the K11 key for 6 seconds to enter pairing mode, during which the indicator light blinks blue rapidly
b.Enable Bluetooth on your computer. Add a new Bluetooth device. Search for the device named Shortcut Remote. Click it to complete Bluetooth pairing. Then the indicator light illuminates solid blue for 30 seconds before turning off