2026 Lightroom Shortcuts for Windows & Mac
KNOWLEDGEIn professional photography, Lightroom shortcuts help you meet deadlines. Most photographers only use 5% of all shortcuts. Whether you use a Mac or Windows, you want to edit faster, cull smarter, and reduce hand strain.
This guide shows you the best Lightroom shortcuts for Mac and Windows .
Part 1: Mac vs. Windows – The Real Differences
Most guides say: Cmd on Mac = Ctrl on Windows. That works for 80% of shortcuts. But the other 20% can confuse you if you switch between platforms often.
Key differences you need to know:
| Action | Mac | Windows |
|---|---|---|
| Delete / Reject | Delete or Cmd + Delete | Delete or Backspace |
| Rename photo | Cmd + Shift + R | F2 |
| Jump to Folder | Cmd + Shift + F | Ctrl + Shift + F |
| Preferences | Cmd + , | Ctrl + , |
Tip for dual-platform users: Remap heavy shortcuts (like Cmd + Shift + T for AI masking) to function keys F1–F12 on one platform.
This keeps your muscle memory clean. Go to Edit > Keyboard Shortcuts (Windows) or Lightroom Settings > Keyboard Shortcuts (Mac).
Part 2: The Best Lightroom Shortcuts – Ranked by Use
Not all shortcuts are equal. Based on hundreds of editing sessions, here are the ones pros use most.
| Rank | Shortcut | Action | What it saves |
|---|---|---|---|
| 1 | P + Caps Lock | Pick and advance | ~2,000 key presses |
| 2 | Before/after toggle | ~500 slider moves | |
| 3 | Ctrl/Cmd + C / V | Copy/paste edits | ~45 minutes of re-editing |
| 4 | G | Back to grid | ~200 mouse moves |
| 5 | D | Jump to Develop | ~200 mouse moves |
| 6 | [ and ] | Brush size change | ~150 trips to the panel |
| 7 | Tab / Shift + Tab | Hide panels | Removes distractions |
| 8 | L twice | Lights out | Helps you focus |
| 9 | Shift + T (2026) | AI Subject Mask | ~300 clicks |
| 10 | Ctrl/Cmd + / | Show shortcut overlay | Saves you from guessing |
Part 3: Culling Fast – Flag, Pick, Reject, and Delete
Culling is where flag shortcuts save the most time. But knowing P for pick and X for reject is not enough. Real speed comes from combining flags with auto-advance.
Core flagging shortcuts:
| Shortcut | Function | Best Used When |
|---|---|---|
| P | Pick (white flag) | You will edit this photo |
| X | Reject (black flag) | Photo is blurry, bad, or extra |
| U | Unflag | You changed your mind |
The Caps Lock Trick (real speed):
Turn on Caps Lock. Then:
-
Press P → Lightroom picks the photo and moves to the next one
-
Press X → Rejects and moves to the next one
-
Press U → Unflags and moves to the next one
Without Caps Lock, you press P then the right arrow key. That extra key press adds 1.5 seconds per photo. Over 2,000 photos, that is 50 wasted minutes.
Delete workflow – reject first, then delete:
Do not delete photos right away. Do this instead:
-
Press X on all bad photos (keep Caps Lock on)
-
After culling, go to Photo > Delete Rejected Photos
-
Choose “Remove from Disk” (not just “From Catalog”)
Pro tip: Map Shift + Delete to “Delete Rejected Photos” in Edit > Keyboard Shortcuts. This saves five menu clicks.
Color labels vs. flags:
-
Flags (P / X): Simple keep or discard
-
Color labels (6=Red, 7=Yellow, 8=Green, 9=Blue): More detail. Example: Red = needs noise reduction, Yellow = needs crop, Green = ready for export
Part 4: How to Change Lightroom Shortcuts
Sometimes Adobe picks a shortcut you do not like. You can change it.
Steps to Change Lightroom Shortcuts (Lightroom Classic 2026)
-
Go to Edit > Keyboard Shortcuts (Windows) or Lightroom Classic > Settings > Keyboard Shortcuts (Mac)
-
Type the command name in the search bar (e.g., “Delete Rejected Photos”)
-
Click the box next to that command
-
Press your new key combo (e.g., Shift + Delete)
-
If another command already uses that key, Lightroom will warn you. You can replace it or cancel
-
Click “Save”
What NOT to change:
Some shortcuts are used by every pro. Changing them will confuse you later.
Do not remap:
-
P / X / U for flags
-
Ctrl/Cmd + Z for undo
-
D for Develop
-
G for Grid
-
E for Loupe
-
Ctrl/Cmd + S for Save Metadata
Part 5: Speed Up Your Lightroom Work with Pilot Pro
You now know all the Lightroom shortcuts. But a keyboard is still hard to use for editing. Your fingers have to stretch and remember many keys. The XPPen Pilot Pro Editing Console fixes this. It is a small controller for one hand. It has buttons, dials, and a joystick. You can put your favorite shortcuts on them.
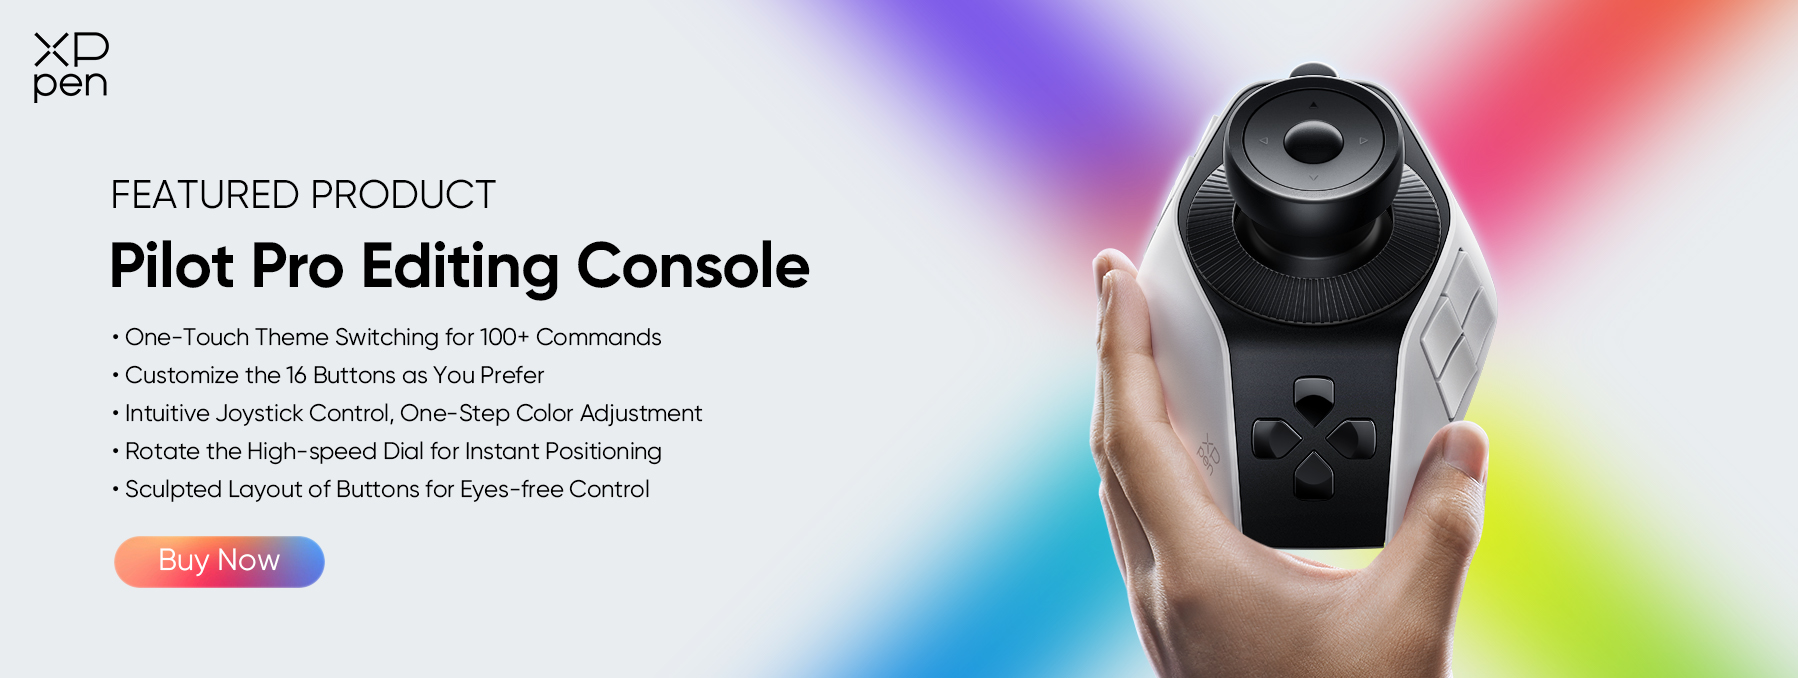
The Pilot Pro helps you edit faster and easier. You can make different shortcut sets for different jobs. One set for culling. One set for color edits. Switch them with one press. The joystick is great for color grading. The dials let you change values smoothly.
Pilot Pro works with Lightroom on Mac and Windows. It also works with Photoshop and Premiere Pro. If you edit many photos, this tool saves you time and keeps your hands comfortable.

Part 6: FAQs about Lightroom Shortcuts
Q1. What are the most important shortcuts for beginners?
Start with these five: P (keep), X (reject), (before/after), D (Develop), and G (Grid). They will speed up your work right away.
Q2. Are shortcuts the same on Mac and Windows?
Almost the same. Just replace Cmd on Mac with Ctrl on Windows. For example, Cmd + C (Mac) = Ctrl + C (Windows).
Q3. Why does my key not work for before/after?
Two common reasons: you are not in the Develop module, or you have a non-US keyboard. Go to Edit > Keyboard Shortcuts and set it to a different key like §.
Q4. Can I use a hardware controller instead of keyboard shortcuts?
Yes. The Pilot Pro Editing Console gives you buttons, dials, and a joystick for Lightroom. You can put your favorite shortcuts on physical controls. No need to look down at your keyboard.
Q5. How do I see all Lightroom shortcuts on screen?
Press Ctrl/Cmd + / (forward slash). Lightroom will show a full shortcut map for the module you are in.
Conclusion
Mastering Lightroom shortcuts is not about being a “tech nerd.” It is about keeping your creative flow. When you stop looking for the Crop icon and just press R, your brain stays on the photo.
Whether you use a Mac or Windows, start today. Pick three shortcuts from this list. Maybe for before/after. P and X for flagging. And G for grid. Use them for one editing session. You will be surprised how much faster you get.
About Us
Founded in 2005, XPPen is a leading global brand in digital art innovation under Hanvon UGEE. XPPen focuses on the needs of consumers by integrating digital art products, content, and services, specifically targeting Gen-Z digital artists. XPPen currently operates in 163 countries and regions worldwide, boasting a fan base of over 1.5 million and serving more than ten million digital art creators.
Learn moreRecommended Articles
KNOWLEDGE How a Shortcut Controller Can Save Time for Artists FOCUSED 5 Best Video Editing Controller 2026 for Beginners & Pros





Looking for the Best Drawing & Design Apps?
Discover essential drawing techniques, expert tips, and the best app recommendations to boost your creativity and master digital art.
