Rule of Thirds in Drawing and Art with Examples 2026
OTHERSThe rule of thirds drawing technique involves dividing your canvas into nine equal parts and placing key subjects along those lines or at their intersections. Understanding the rule of thirds in art can completely change the look and feel of your drawings. Many beginners struggle with compositions that feel “off,” even when the drawing itself is good. It happens because elements are placed randomly or centered too much.
The idea behind this rule is not complicated, but you need practice to use it perfectly. This guide explains what is the rule of thirds , how it works, and how you can apply it in your drawings without overthinking.
Part 1. What is the Rule of Thirds in Drawing and Art
The rule of thirds drawing method divides any canvas into a 3×3 grid, creating nine equal sections. The key idea is to place important elements along the grid lines or at the four intersection points instead of the center. This concept has roots in classical art theory and was later popularized in photography.
In the rule of thirds in painting , artists place the horizon along the top or bottom third instead of the middle. This small shift makes a scene feel more dynamic. For example, placing the horizon lower emphasizes the sky, while placing it higher highlights the ground.
This rule is very useful because it naturally matches human visual behavior. People don’t focus on the center first; they scan across the frame. When your subject sits on these lines or intersections, it feels more intentional and easier to look at.
Part 2. How Does the Rule of Thirds Work
The rule of thirds drawing approach works because it guides attention without forcing it. Instead of placing your subject dead center, you shift it slightly off-center, which creates movement and visual interest.
Think of your canvas divided like this:
-
Two horizontal lines
-
Two vertical lines
-
Four intersection points
These intersection points are often called “power points”, where the viewer’s eye naturally lands first.
For example, if you’re drawing a portrait, placing the eyes along the top horizontal line makes the face feel more engaging. If you are sketching a landscape, aligning the horizon with one of the horizontal lines instantly improves the scene.
A common beginner mistake is trying to follow the grid too strictly. The rule isn’t about precision, it’s about placement. Even a rough alignment can make a big difference.
Part 3. Rule of Thirds Drawing and Art Examples
A good way to get a feel for the rule of thirds is to stop thinking about grids for a second and just look at how your eye moves through a painting.
Take The Starry Night by Vincent van Gogh . Your attention doesn’t land in the center—it goes straight to the sky. That’s partly because the horizon is pushed down, close to the lower third, giving all that space to the swirling stars.
Then there’s the cypress tree on the left, rising almost exactly where a vertical third would be. It quietly pulls your gaze upward and keeps the whole composition from feeling lopsided.

The Starry Night – Vincent van Gogh
Artwork Information:
-
Artist: Vincent van Gogh
-
Year: 1889
-
Medium: Oil on canvas
-
Location: Museum of Modern Art, New York
Now compare that to Summer Evening on Skagen's Southern Beach by Peder Severin Krøyer . The feeling is completely different—calm, open, a bit quiet.
Here, the horizon sits higher, closer to the top third, so the beach and reflected light take up more space. The two figures aren’t centered either; they sit slightly off to one side, which makes the scene feel more natural, like you just happened to walk into it.

Summer Evening on Skagen's Southern Beach – Peder Severin Krøyer
Artwork Information:
-
Artist: Peder Severin Krøyer
-
Year: 1893
-
Medium: Oil on canvas
-
Location: Skagens Museum, Denmark
What these have in common is simple: nothing important is stuck dead center. Once you start noticing that, the rule of thirds stops feeling like a rule—and more like a habit your eye already prefers.
Part 4. How to Use the Rule of Thirds in Drawing
Applying the rule of thirds drawing method becomes easier when you follow a simple process. It’s less about memorizing rules and more about building a habit while sketching.
Start by imagining or lightly sketching a grid on your page. Many digital tools already include grid overlays, which makes this step even quicker. Here are the simple steps:
Step 1: Define the Picture Plane
Start by marking the area where your drawing will sit. This is your picture plane, and it acts as a boundary for your composition. A simple rectangular box works well. Keep the lines light so they don’t interfere later. You can draw it freehand or use tape if you prefer sharper edges.
Step 2: Divide the Picture Plane into Thirds
Split the picture plane into three equal parts horizontally and vertically to form a grid. The goal is balance, not perfect measurement, so keep it close enough. Some artists extend lines across the page, while others keep them inside the frame. Either way works as long as the grid stays visible during the early stages.
Step 3: Plan the Composition Using Intersections
Focus on the four points where the grid lines cross. These spots naturally attract attention and help guide placement. Position your main subject close to one of these intersections instead of placing it in the center. You don’t need these positions exactly; a slight variation still creates a strong composition.

Step 4: Sketch the Main Elements
Lightly sketch the key elements of your drawing based on your planned layout. Start with the main subject and place it near one intersection, then build the rest of the scene around it. Keep details minimal at this stage. Once the structure feels right, you can refine and soften grid lines before adding final details.
Extra Tip for Drawing
What really improves digital drawing is not only learning composition rules. The right tool also matters. It helps you adjust shapes, spacing, and balance faster while you draw.
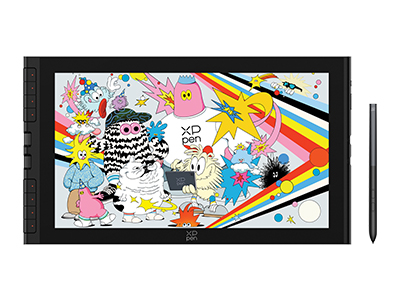
XPPen Artist 16 3rd is built to feel more like drawing directly on paper.
The pen responds smoothly to pressure so your lines don’t feel “stepped” or disconnected, and it’s easier to get both light sketching and strong strokes in the same motion.
The small dial on the side also helps a lot in practice—you can adjust zoom or brush size without breaking your rhythm, which sounds minor but actually keeps you in the drawing mindset longer instead of clicking around menus.
Part 5. Golden Rules in Drawing and Art
The rule of thirds in art is powerful; when it is combined with other composition techniques, it works best. These ideas help you build stronger drawings overall.
1. Perspective
Perspective controls depth and distance. Without it, even well-placed subjects can feel flat. Using one-point or two-point perspective gives structure to your composition and supports the rule of thirds placement.
2. Positive and Negative Space
Artists use positive and negative space to maintain balance. Positive space is your subject, while negative space is everything around it. Good compositions use empty space intentionally rather than filling every area.
3. The Triangle Composition
Artists arrange subjects in a triangular layout. This creates stability and naturally guides the viewer’s eye across the artwork.
4. Central Focus
Sometimes breaking the rule works. A strong central subject can still look great if supported by contrast, lighting, or framing. The key is intention, not strict rules.
Together, these ideas help you move beyond basic layouts and create more thoughtful compositions.
Part 6. FAQs about Rules of Drawing
Q1: Why is the rule of thirds so effective and important?
This rule is important and effective; it matches how people naturally view images. Instead of focusing on the center, the eye moves across the frame. Placing subjects along thirds creates balance and keeps the viewer engaged without feeling forced.
Q2: What are the 7 laws of drawing?
7 laws of drawing are balance, contrast, emphasis, movement, pattern, rhythm, and unity. These guide how elements interact in a composition. The rule of thirds supports many of these by improving balance and emphasis.
Conclusion
The rule of thirds is a small shift, but it changes how a drawing feels almost immediately. Moving things slightly off-center creates balance, gives the eye a natural path to follow, and makes compositions feel less rigid. It doesn’t need to be applied perfectly—just being aware of it already improves how you arrange a scene.
When you start applying it more often, you also notice something else: it becomes easier when your tools don’t slow you down. A display like XPPen Artist 16 3rd is a solid choice for both beginners and professional artists. It supports learning composition, but also fits real creative workflows where speed, control, and comfort all matter in daily work.
About Us
Founded in 2005, XPPen is a leading global brand in digital art innovation under Hanvon UGEE. XPPen focuses on the needs of consumers by integrating digital art products, content, and services, specifically targeting Gen-Z digital artists. XPPen currently operates in 163 countries and regions worldwide, boasting a fan base of over 1.5 million and serving more than ten million digital art creators.
Learn moreRecommended Articles
OTHERS Ibis Paint X Tutorial for Beginners: How to Draw a Woman Face FOCUSED XPPen Artist 12 3rd Review: The Best Portable Drawing Tablet for Beginners BEGINNER Should a Beginner Get a Drawing Tablet?


Want to elevate your drawing skills?
Discover step-by-step tutorials, expert tips, and creative techniques to boost your drawing skills.
