Adobe Premiere Pro Tutorial for Video Editors [Beginner's Guide]
KNOWLEDGEAfter watching a YouTube video, you ask yourself, "Did they make that so perfect?" You see flawless music, crisp text titles, colour effects, seamless cuts, and cool transitions. The majority of those videos were created with Adobe Premiere Pro, which is why everything looks so polished.
So, how to learn Adobe Premiere Pro? Everything is explained in simple, step-by-step language in this article. By the end of this guide, you will be able to import your footage, edit your clips, add effects and text, and export your first video with confidence. Let's get started.
What Is Adobe Premiere Pro?
Adobe Premiere Pro is a video editing software made by Adobe. It is used by YouTubers, movie makers, news channels, and even Hollywood studios. It works on both Windows and Mac computers. It is part of Adobe Creative Cloud, which means it connects easily with other Adobe tools like After Effects, Photoshop, and Audition. You can learn more from Adobe's official learning hub .
What Do You Need to Get Started?
Before you install the software, make sure your computer is ready to run it. You will need at least 8 GB of RAM , but 16 GB is a better choice if you want smoother performance. Keep at least 4 GB of free space on a fast SSD for the installation. The software works with most modern graphics cards, although a dedicated GPU can make it run better. It also supports Windows 10 or 11 and macOS 12 or later .
When your computer is ready, go to the Adobe website , create or sign in to your Creative Cloud account, and download the installer. If you're not ready to buy it yet, you can start with Adobe's free trial to see if it meets your needs.
How to Import Your Video Clips?
Editing cannot begin until your footage is inside the project. The easiest way to bring files into Adobe Premiere Pro is to go to File > Import , find your clips on your computer, and click Open. You can also just drag and drop files straight from a folder on your desktop into the Project Panel; whatever feels easier.
Once your clips are inside, take one extra minute to organise them into bins. A bin is just a folder inside your Project Panel. Make one bin for your raw video footage, one for music and sound effects, and one for any photos or graphics. This small habit saves a huge amount of time later when your project gets bigger and you need to find a specific file quickly.
Create Your First Sequence
A sequence is where your editing happens. It's the timeline where you place your video clips, arrange them in the right order, and build your final video. There are two easy ways to create a sequence. You can right-click inside the Project Panel , choose New Item > Sequence , and select the settings you want. The easier option is to drag a video clip directly onto the timeline. Premiere Pro will automatically create a new sequence using the same settings as your clip, which is the best choice for most beginners.
Once your sequence is ready and your clips are on the timeline, you can start making your first edits. The basic editing tools below are all you need to cut, move, and arrange your clips with confidence.
- Razor Tool (C): Cuts a clip into two separate parts.
- Selection Tool (V): Selects, moves, and rearranges clips on the timeline.
- Ripple Delete: Removes a clip and automatically closes the space so your timeline stays organised.
- J, K, and L Keys: Control playback, rewind, pause, and fast-forward your video while editing.
- I and O Keys: Mark the 'in' and 'out' points of a clip before adding it to the timeline or trimming it.
These tools are the foundation of video editing in Premiere Pro. Once you're comfortable using them, editing will become much faster and easier.
Also Read: Best Video Editing Courses Free & Paid
Working With Audio: Make Your Video Sound Great
A good video with bad audio is still a bad video. Audio is just as important as the picture. Here is how to handle it in Adobe Premiere Pro :
- Adjust volume levels: Click on a clip, go to the Audio tab, and drag the volume slider up or down
- Essential Sound Panel: Go to Window > Essential Sound. Choose Dialogue, Music, or SFX and let Premiere fix the sound automatically
- Fade in / Fade out: Right-click on an audio clip and choose 'Apply Default Transitions' for a smooth fade
If you recorded your voice separately from your camera. You can sync the audio by matching the waveforms (the audio wave pattern) manually on the timeline.
Adding Transitions and Effects
Transitions are the animations between two clips — like a fade or a slide. Effects are visual changes you apply to a single clip, like making it black and white or adding a blur.
To add a transition:
- Go to the Effects Panel (Window > Effects)
- Search for 'Cross Dissolve', the most popular and clean-looking transition
- Drag it to the cut point between two clips on the timeline
For color grading (making your video look cinematic), use the Lumetri Color Panel. You can adjust brightness, contrast, and shadows, and even apply a LUT (a color preset) for a professional film look.
Adding Text and Titles to Your Video
Want to add your name, a title card, or subtitles? Use the Essential Graphics Panel in Adobe Premiere Pro .
- Go to Window > Essential Graphics
- Click New Layer > Text to add text directly on your video
- Change the font, size, and color on the right-side panel
- Animate it by adding keyframes, set a start position and an end position, and Premiere will move it smoothly
You can also download free motion graphics templates (.mogrt files) from Adobe Stock. Drop them right into your project for ready-made animated titles.
Exporting Your Finished Video
You have edited everything. Now it is time to save your video as a file you can upload or share. This is called exporting .
- Go to File > Export > Media (or press Ctrl+M / Cmd+M)
- Choose H.264 as the format; this is best for YouTube, Instagram, and most online platforms
- Select 'YouTube 1080p Full HD from the preset dropdown
- Click 'Export' and wait for it to finish
If you want to export multiple videos at once, use Adobe Media Encoder it runs in the background, so you can keep editing while it exports.
Improve Your Editing Skills with the Right Tools
Tips that most beginner tutorials skip: Your input device matters .
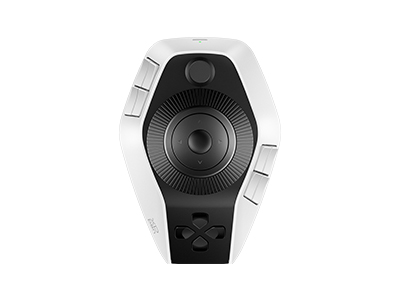
When you are doing precise work in Adobe Premiere Pro, like masking a face or doing colour grading, using a mouse can feel slow. Professional video editors often switch to a dedicated editing console for much more control and efficiency.
One great option is the XPPen Pilot Pro . It is a professional-grade editing console that works perfectly with Adobe software. With its tactile keys and dials, you get smoother control for trimming, colour work, and timeline navigation. It is a tool that will make your editing faster and more enjoyable.

Ready to Start Editing? Follow these steps one by one
Now it's time to put everything you've learnt into practice. Follow these simple steps to create your first video in Adobe Premiere Pro:
Step 1: Open Adobe Premiere Pro and create a new project.
Step 2: Import your videos, photos, and audio files into the Project Panel.
Step 3: Create a new sequence by dragging your first video clip onto the timeline.
Step 4: Arrange your clips in the order you want and trim or cut them using the basic editing tools.
Step 5: Add transitions, text, effects, and background music to make your video more engaging.
Step 6: Adjust your audio levels and improve sound quality with the Essential Sound Panel.
Step 7: Apply basic colour correction to give your video a clean and professional look.
Step 8 : Preview your project, make any final changes, and export it in the quality and format you need.
The more you practise, the more comfortable you'll become with Premiere Pro. Even spending a few minutes editing each day will help you build your skills and confidence. Keep experimenting with different tools and techniques, and you'll see steady improvement over time.
Conclusion
Adobe Premiere Pro may look difficult at first, but when you learn the basics, video editing becomes much easier. Start with simple cuts, transitions, audio, and text, then practise regularly to improve your skills. With the right workflow and tools, you'll be creating professional-looking videos with confidence in no time.
About Us
Founded in 2005, XPPen is a leading global brand in digital art innovation under Hanvon UGEE. XPPen focuses on the needs of consumers by integrating digital art products, content, and services, specifically targeting Gen-Z digital artists. XPPen currently operates in 163 countries and regions worldwide, boasting a fan base of over 1.5 million and serving more than ten million digital art creators.
Learn more


Looking for the Best Drawing & Design Apps?
Discover essential drawing techniques, expert tips, and the best app recommendations to boost your creativity and master digital art.
