DaVinci Resolve Shortcuts for Mac & Windows [The Complete Guide]
KNOWLEDGEHave you ever noticed a video editor at work and wondered, 'How are they moving so fast?' The secret is simple: they use keyboard shortcuts. A shortcut is pressing two or three keys at the same time to perform tasks fast.
DaVinci Resolve is free video editing software used by beginners and big movie studios. Learning its shortcuts is like learning a secret code. Once you know it, editing becomes way faster and way more fun.
In this guide, we will go through the most useful DaVinci Resolve shortcuts one group at a time. Even if you are new to it, you can follow it easily.
What Are DaVinci Resolve Shortcuts and Why Do They Matter?
DaVinci Resolve shortcuts are simple key combinations that help you edit faster by reducing mouse clicks. For example, pressing Ctrl + S saves your project much faster than going to File > Save.
That is the matter because shortcuts make editing faster, smoother, and more efficient. Even saving a few seconds on common tasks can add up to minutes or hours over multiple projects. More importantly, they help you stay focused on your creative work instead of constantly searching through menus. As your editing skills improve, using shortcuts becomes second nature, allowing you to work with greater speed and accuracy.
Most Useful DaVinci Resolve Shortcuts by Category
DaVinci Resolve shortcuts are grouped by different tasks, making them easy to learn. Below are the most useful shortcuts, with both Windows and Mac keys.
Application Shortcuts
These are the basic shortcuts for managing your project, opening settings, and staying organised. If you're new to DaVinci Resolve, start with these first.
| Action | Windows | Mac |
|---|---|---|
| Save Project | Ctrl + S | Cmd + S |
| Import Project | Ctrl + I | Cmd + I |
| Export Project | Ctrl + E | Cmd + E |
| Save Project As | Ctrl + Shift + S | Cmd + Shift + S |
| New Timeline | Ctrl + N | Cmd + N |
| New Bin | Ctrl + Shift + N | Cmd + Shift + N |
| Preferences | Ctrl + | Cmd + |
| Undo | Ctrl + Z | Cmd + Z |
| Redo | Ctrl + Shift + Z | Cmd + Shift + Z |
| Quit DaVinci Resolve | Ctrl + Q | Cmd + Q |
Get into the habit of pressing Ctrl+S every few minutes. It takes less than a second and prevents work loss if the software crashes unexpectedly.
Editing Shortcuts
These are the shortcuts you will use the most. They cover everything from switching tools to cutting, trimming, and managing clips on your timeline.
| Action | Window | Mac |
|---|---|---|
| Switch to Edit Mode | A | A |
| Switch to Trim Mode | T | T |
| Blade (Cut) Tool | B | B |
| Select Razor Tool | Ctrl + B | Cmd + B |
| Split Clip at Playhead | Ctrl + | Cmd + |
| Join Two Clips | Alt + | Option + |
| Enable / Disable Clip | D | D |
| Select All Clips | Ctrl + A | Cmd + A |
| Deselect All | Ctrl + Shift + A | Cmd + Shift + A |
| Overwrite Edit | F10 | F10 |
| Insert Edit | F9 | F9 |
| Overwrite Edit | F10 | F10 |
| Replace Edit | F11 | F11 |
| Ripple Delete | Delete | Delete |
| Trim Clip Start | Shift + [ | Shift + [ |
| Toggle Snapping On/Off | N | N |
| Copy Clip Attributes | Ctrl + C then Alt + V | Cmd + C then Option + V |
| Adjust Clip Speed | Ctrl + R | Cmd + R |
Press B to activate the Blade tool, click where you want to cut, then press A to go back to the selection tool. This is one of the most-used two-key combos in all of DaVinci Resolve.
Playback and Navigation Shortcuts
Navigation shortcuts help you move through your timeline quickly. The J, K, L keys are the most important ones here; almost every professional editor uses them every single day.
| Action | Window | Mac |
|---|---|---|
| Play / Pause | Space | Space |
| Play Forward (speeds up with each press) | L | L |
| Stop Playback | K | K |
| Play in Reverse (speeds up with each press) | J | J |
| Fast Forward | Shift + L | Shift + L |
| Fast Reverse | Shift + J | Shift + J |
| Move One Frame Forward | Right Arrow | Right Arrow |
| Move One Frame Backward | Left Arrow | Left Arrow |
| Jump to Next Clip | Down Arrow | Down Arrow |
| Jump to Previous Clip | Up Arrow | Up Arrow |
| Go to Timeline Start | Fn + Left Arrow | Fn + Left Arrow |
| Go to Timeline End | Fn + Right Arrow | Fn + Right Arrow |
| Toggle Loop On/Off | Ctrl + / | Cmd + / |
| Go to First Frame of Clip | ; | ; |
| Go to the Last Frame of the clip | ' | ' |
| Jump 5 Frames Forward | Shift + Right Arrow | Shift + Right Arrow |
| Jump 5 Frames Backward | Shift + Left Arrow | Shift + Left Arrow |
Press L once for normal speed, twice for 2x, and three times for 4x. Press J to go backward. Press K to stop. This JKL system feels awkward at first, but becomes incredibly natural after just a few sessions
Marker Shortcuts
Markers are coloured flags you drop on your timeline to mark important moments like a beat drop in music, a line that needs replacing, or a section you want to revisit. These shortcuts make working with markers fast and clean.
| Action | Window | Mac |
|---|---|---|
| Set In Point | I | I |
| Set Out Point | O | O |
| Remove In Point | Alt + | Option + I |
| Remove Out Point | Alt + O | Option + O |
| Clear Both In and Out | Alt + X | Option + X |
| Add Marker | M | M |
| Delete Marker | Alt + M | Option + M |
| Edit Marker Details | Shift + M | Shift + M |
| Jump to Next Marker | Shift + Down Arrow | Shift + Down Arrow |
| Jump to Previous Marker | Shift + Up Arrow | Shift + Up Arrow |
| Play In to Out | Alt + / | Option + / |
Use I to set your In point and O to set your Out point on a source clip, then press F9 to insert it directly into the timeline. This three-key combination is how fast editors work.
Color Grading and Effects Shortcuts
DaVinci Resolve is world-famous for its color grading tools. These shortcuts are used in the Color workspace, where you work with nodes, curves, and grades. Learning them makes color work significantly faster.
| Action | Windows | Mac |
|---|---|---|
| Add Video-Only Transition | Alt + T | Option + T |
| Retime / Speed Controls | Ctrl + R | Cmd + R |
| Add Serial Node | Alt + S | Option + S |
| Add Parallel Node | Alt + P | Option + P |
| Add Layer Node | Alt + L | Option + L |
| Enable / Disable Node | Ctrl + D | Cmd + D |
| Enable / Disable All Nodes | Alt + D | Option + D |
| Reset All Grades and Nodes | Ctrl + Home | Ctrl + Home |
| Bypass All Color Grades | Shift + D | Shift + D |
| Add Keyframe | Ctrl + [ | Cmd + [ |
| Delete Keyframe | Alt + ] | Option + ] |
| Go to Next Keyframe | [ | [ |
| Go to Previous Keyframe | ] | ] |
Think of nodes like stacked adjustment layers. Press Alt+S to add a new Serial Node whenever you want to apply a separate, isolated grade, keeping your work organised and easy to adjust later.
Workspace Shortcuts
DaVinci Resolve has seven different workspaces: Media, Cut, Edit, Fusion, Colour, Fairlight, and Deliver. Instead of clicking the tabs at the bottom of the screen, jump between them instantly with these shortcuts.
| Action | Windows | Mac |
|---|---|---|
| Go to Media Workspace | Shift + 2 | Shift + 2 |
| Go to Cut Workspace | Shift + 3 | Shift + 3 |
| Go to Edit Workspace | Shift + 4 | Shift + 4 |
| Go to Color Workspace | Shift + 6 | Shift + 6 |
| Go to Deliver Workspace | Shift + 8 | Shift + 8 |
| Toggle Full Screen | Shift + F | Shift + F |
| Zoom In on Timeline | + | + |
| Zoom Out on Timeline | – | – |
| Switch Source / Timeline Viewer | Q | Q |
| Open Video Scopes | Ctrl + Shift + W | Cmd + Shift + W |
| Split Screen View | Ctrl + Alt + W | Cmd + Option + W |
How to Customize Keyboard Shortcuts in DaVinci Resolve
Not everyone works the same way. Maybe you are switching from Premiere Pro and already have muscle memory for different keys. Or maybe you just want certain commands on easier-to-reach keys. DaVinci Resolve makes it simple to change any shortcut to whatever feels natural for you.
How to access and edit your shortcuts, step by step
Step 1
Open DaVinci Resolve on your computer.
Step 2
On Mac, click DaVinci Resolve in the top-left menu. On Windows, go to the main menu bar.
Step 3
Select 'Keyboard Customisation' from the dropdown.
Step 4
A full on-screen keyboard appears, showing every assigned shortcut colour-coded by type. Keys with conflicts show a number to warn you.
Step 5
Click any key to assign it a new command, or use the search box at the bottom to find a specific action by name.
Step 6
You can also choose from preset layouts based on Premiere Pro or Final Cut Pro, which is great if you are switching from another editing app.
Step 7
Save your custom layout as a named profile so it loads automatically every time you open Resolve.
One important thing to know: the same key can do different things in different modes. For example, the D key disables a clip in the Edit workspace, but it may do something entirely different in the Color workspace. DaVinci Resolve handles this automatically; the correct action fires depending on where your focus is.
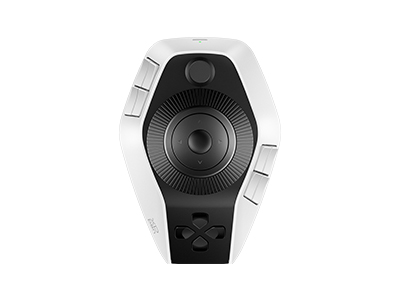
Meet the XPPen Pilot Pro
Keyboard shortcuts are powerful. But there is a point where even the fastest typist hits a ceiling, especially during color grading, where you need fine, precise movements that a keyboard simply cannot provide. That is where purpose-built hardware comes in.
The XPPen Pilot Pro is a dedicated editing console designed specifically for creative workflows like video editing and color grading. It is compact, ergonomic, and works seamlessly with DaVinci Resolve. Instead of reaching for keyboard shortcuts, you control the software with buttons, dials, and a joystick, all within reach of your left hand while your right hand stays on the mouse.

What does the XPPen Pilot Pro do?
The Pilot Pro is built around three types of controls: 19 programmable buttons, three dials (including a high-speed dial for fast timeline scrubbing), and a multi-directional joystick. Here is what each one does in practice:
-
Buttons: Map any DaVinci Resolve shortcut to a physical button. One tap for Undo, one for Add Node, and one for Play/Pause; no keyboard combination is needed.
-
High-speed dial: Spin it to scrub through your timeline quickly and land on the exact frame you need for trimming.
-
Precision knob: Use it for fine adjustments, moving the playhead frame by frame, or rotating and scaling clips with exact control.
-
Joystick: In the Color workspace, use it to adjust color wheel values smoothly and precisely, the kind of control a mouse struggles to give you.
The Pilot Pro supports up to 7 custom themes, so you can have one set of button assignments for editing and another for color grading, and switch between them with a single tap. It connects via Bluetooth, a 2.4G wireless dongle, or wired USB-C, and has a built-in battery that lasts over 15 days on a full charge.
How to Set Up the XPPen Pilot Pro with DaVinci Resolve
Getting started takes about ten minutes. Here is the step-by-step process:
- Download and install the official XPPen driver from the XPPen website. This is what lets you customise the buttons and dials.
- Connect the Pilot Pro to your computer via USB-C cable, the included wireless dongle, or Bluetooth 5.4.
- Open the XPPen driver software on your computer.
- In the Application Settings section, click to add DaVinci Resolve as a linked application. The Pilot Pro will detect when Resolve is in focus and activate your custom layout automatically.
- Assign your most-used DaVinci Resolve shortcuts to the physical buttons. Good starting assignments: one button for Undo, one for Add Serial Node (Alt+S), one for Bypass All Grades (Shift+D), and one for the Play/Pause space bar.
- Create a second theme for your color grading workflow, with the joystick set to control color wheel adjustments and the dials set to control lift, gamma, and gain.
- Open a project in DaVinci Resolve and start using it. It will feel different for a day or two, but most editors report that it becomes an irreplaceable part of their setup very quickly.
What makes the Pilot Pro especially useful is the eyes-free design. The buttons are laid out so that your fingers learn where everything is without looking down. That means your eyes stay on the screen and your brain stays on the edit – the same reason learning DaVinci Resolve shortcuts matters in the first place.
Tips for Learning DaVinci Resolve Shortcuts Faster
Knowing a shortcut list and actually using shortcuts in the middle of an edit are two different things. Some practical ways to close that gap
- Start with three to five shortcuts. Do not try to memorise everything at once. Pick the ones you use most probably: Save, Undo, Play/Pause, and the Blade tool, and drill using those until they are automatic.
- Use the JKL system from day one. This playback shortcut trio is the single fastest thing you can learn. Spend one editing session forcing yourself to use only J, K, and L for playback control.
- Keep the shortcut list somewhere visible. Print this guide or keep it open on your phone until the keys become muscle memory.
- Practice on real projects. Shortcuts stick when they solve real problems. Edit actual footage, not practice files.
- Assign complex shortcuts to hardware buttons. If a command requires three keys together, map it to a single button on the Pilot Pro. You can press it without breaking your flow.
Conclusion
Learning DaVinci Resolve shortcuts helps you edit faster, stay focused, and work more efficiently. Start with the basic shortcuts and add new ones as you gain experience.
The XPPen Pilot Pro lets you assign shortcuts to its buttons, dials, and joystick. This helps you edit and color grade faster with less effort. Open DaVinci Resolve, practise a few shortcuts from this guide, and make them part of your daily editing routine.
About Us
Founded in 2005, XPPen is a leading global brand in digital art innovation under Hanvon UGEE. XPPen focuses on the needs of consumers by integrating digital art products, content, and services, specifically targeting Gen-Z digital artists. XPPen currently operates in 163 countries and regions worldwide, boasting a fan base of over 1.5 million and serving more than ten million digital art creators.
Learn moreRecommended Articles
KNOWLEDGE Snipping Tool Shortcut Complete Guide for Windows 11/10 KNOWLEDGE 2026 Lightroom Shortcuts for Windows & Mac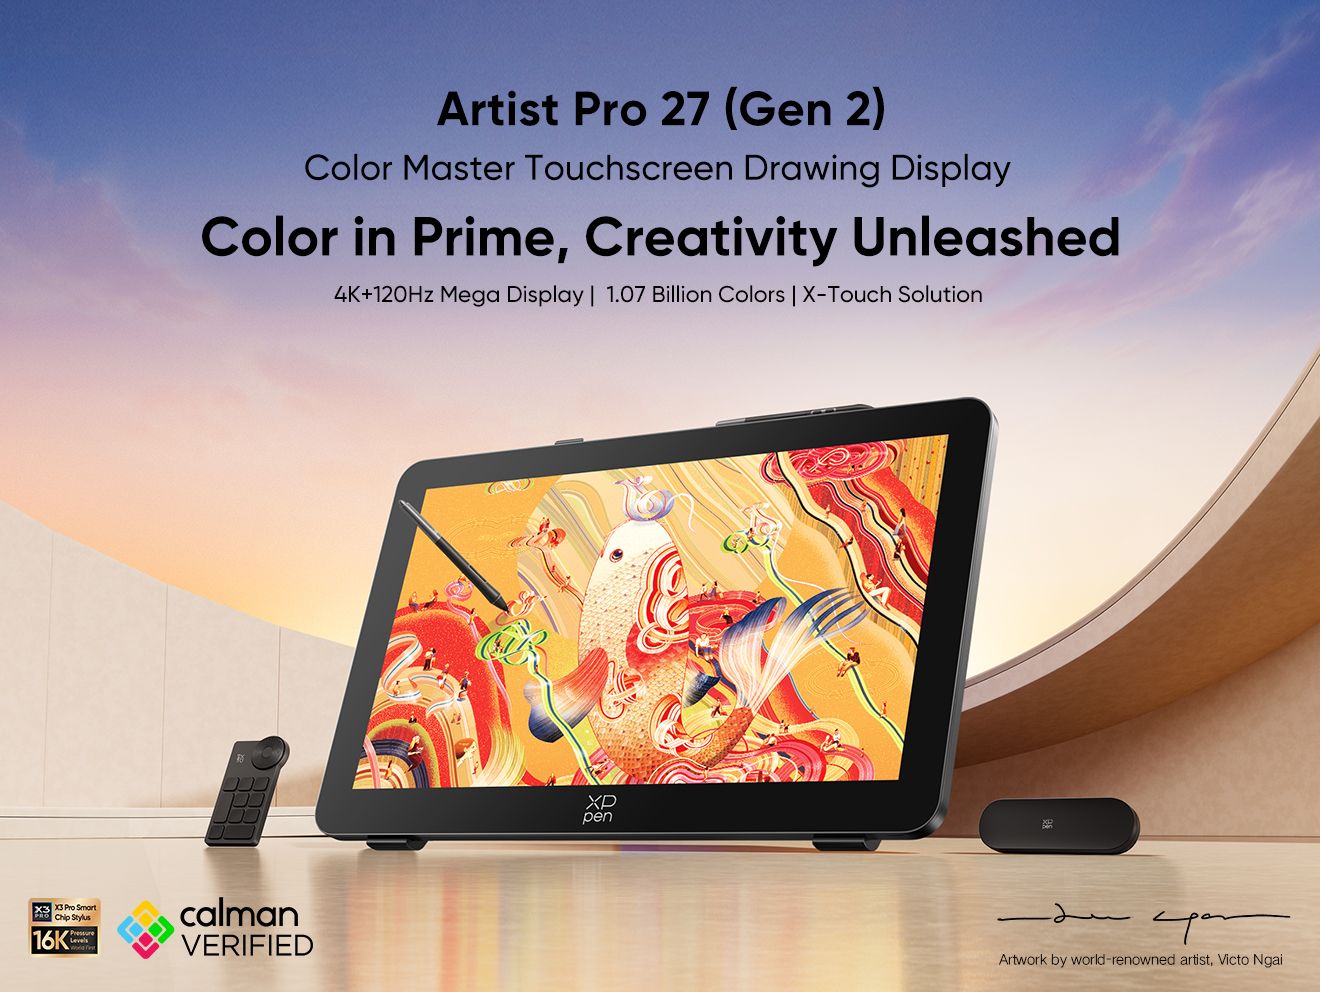


Looking for the Best Drawing & Design Apps?
Discover essential drawing techniques, expert tips, and the best app recommendations to boost your creativity and master digital art.
