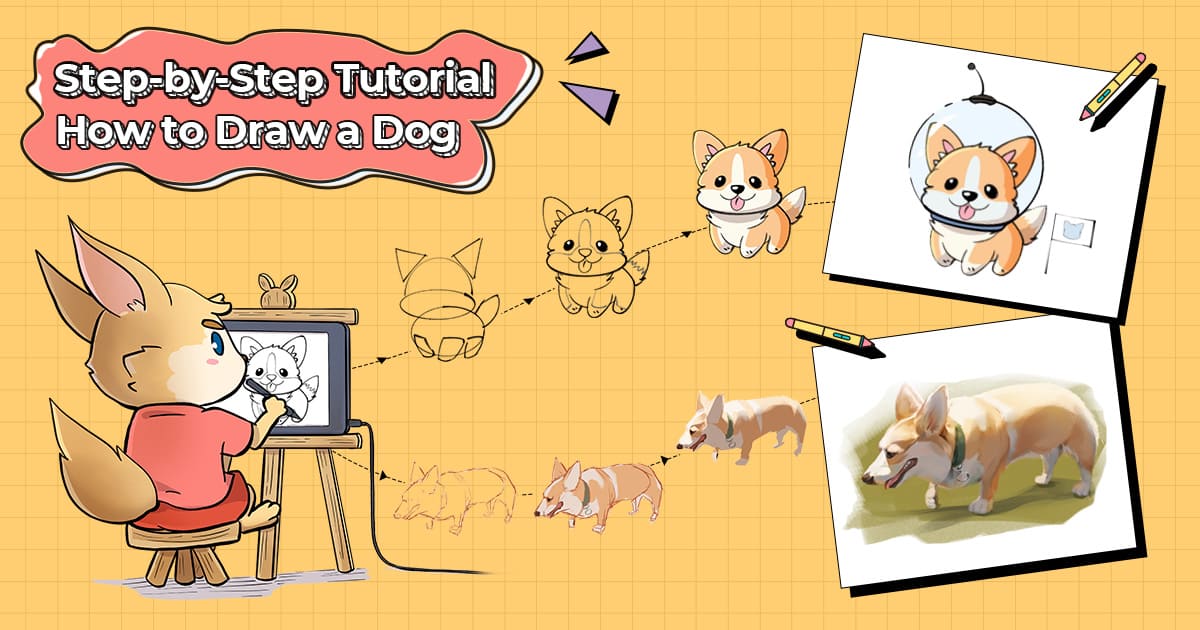
How to Draw a Cute Dog with Simple Steps (Cartoon & Realistic Styles)
ANIMALS
Whether you want to add a lovely illustration on a poster or just have fun doodling with kiddos, drawing a cute puppy is a good idea. But how to use the strokes and colors precisely to present this adorable fluffy creature? Here we present a step-by-step guide on how to draw a cute dog easily in cartoon and realistic styles.
What to prepare before drawing a dog?
Draw a dog on paper
A piece of paper, a pencil, colored pencils, or watercolor paint... That's all you need to create a cute dog illustration. These are the basics and yet can create wonderful effects.
Draw a dog on the computer
Tired of cleaning up messy color palettes? The digital art world has the perfect solution for you. With a computer and a graphic design app, you can create a cute dog image that never fades or wears out.
However, it might take more time for you to master how to create stunning visuals with a mouse. To present the perfect shapes and strokes, use the XPPen Artist 13 (2nd Gen) drawing display, XPPen Deco MW drawing tablet, and styluses rather than a computer and a mouse. As most drawing tablets are compatible with a wide range of graphic design software, the creation process is hassle-free once you get the tablet connected and the tablet driver installed on your computer.
Part 1 - How to Draw a Cute Dog in Cartoon Style Easily
Who can resist those puppy eyes and a tiny pinky tongue? To draw a cute dog, start with a reference photo - maybe snap one now of your fluffy friend sitting patiently by your side! Small-to-medium dog breeds, such as Chihuahuas, Sausage Dogs, and Poodles, are brilliant models for cartoonish drawings. Here, we use the Welsh Corgi breed as a prototype. Their compact body and short legs make them the perfect model for kawaii(Japanese for 'cute') dog illustrations.

Step 1: Create a composition with simple shapes

For starters, create a general composition with a brush tool (like a pencil). Use an ellipse as the body and rectangles around as the legs and a tail. Above the body a flat ellipse as the mouth. Then add a semicircle above the body as the head with two triangles symbolizing the ear.
This helps you position the body part of the puppy later. The position and size of the general body part of the dog drawing don't need to be the same as the real-life composition. You can use flat shapes to make the puppy chubby. Or, adopt an oversized head proportion, if you are wondering how to draw a chibi dog.
Step 2: Draft a silhouette with construction lines

Now that we've drawn a general composition of a dog on one layer, we can create another layer and reduce the opacity of the first one. We can further outline the cute dog using the shapes we made in the first step.
Add dividing lines that divide the face in half vertically, then horizontally through where the eyes roughly sit. You can add more guidelines to help you better understand different parts and achieve the right proportions.
Tip: How to Draw a Cute Dog in Various Poses Easily
It takes a lot of practice to accurately capture a still-life object's shape and composition. Let alone drawing a living creature. To draw a cute dog in various poses, the best place to start is to use a photograph as a reference to draft the composition easily. In case you don’t have cute dog pictures available at hand, here are four outlines of a cartoonish dog in various poses: sitting sideways, running to the left and the right, and facing forward.

Step 3: Refine the sketch with details

We've drawn a rough sketch in Step 2, so now we can lower the opacity of the second layer and create the third one. In this layer, we can redraw the outlines with more details and variety, focusing on parts of the dig like its nose, eyes, ears, dots, fur patterns, etc., to make it look cuter and livelier.
Step 4: Add vibrant colors to the sketches
Before coloring, create a new layer underneath the sketch layer. And use the brush to distinguish the blocks of color. Here for this corgi, We use 4 shades - 2 shades of yellow for the coat, a light pink shade for the tongue and part of the inner ears, and a black shade for the nose and eyes. Divide these blocks and then fill in the color. Of course, if you want to use different colors for your dog drawing, feel free to switch it up. Use your creativity and imagination!
Step 5: Create shades with cooler colors

Create one more layer to differentiate the light and shade. This is where you should determine the light source in your dog drawing because it will dictate the highlights and shadows of your work. For this example, we assumed that the light source is from the left. In that case, the left side of the dog is brighter, and the right rear is darker, as the picture above shows.
Step 6: Add personalized decorations to your cute dog drawing

Finally, you can add creative elements you like to make your drawing come to life. We added a cute astronaut helmet and a flag pole at the side of this cute "Astro-corgi" ready to explore Outer Space! Feel free to give your cartoon dog character a name, personality, and storylines!
Part 2 - How to Draw a Cute Dog in a Realistic Style
If you like how we draw a cute cartoon dog in the first part but want to learn more on how to draw a cute dog in a realistic style, we got you covered!
In this part, we will guide you through the step-by-step process of sketching, coloring, and shading a realistic dog drawing. We will still focus on how to draw a Corgi as an example. Let's get started!

Step 1: Create a general outline of your dog

First, have a general understanding of the structure and orientation in your mind. For example a corgi is known for its short stature and adorable face. So, we would need to form the whole figure with several basic shapes corresponding to the short stature and features of corgis in real life. the same as the first step in part one. Use circles to form the body, head, and nose. Add ears and legs with other shapes. Pay attention to the size and position of these forms; in this case, we want to get it right to create a lifelike look for the dog.
Step 2: Sketch your dog

After creating the general position and structure of the dog with basic forms, we can now further sketch the dog. Reduce the opacity of the first layer and then create a new layer to further outline the dog based on the basic forms we’ve created in the first step.
You can always add auxiliary lines to indicate the placement of ears, eyes, and snout to help you achieve the correct proportions later.
Step 3: Lay a base shade for your dog

Next, create a new layer to paint a layer of the base shade, and now we get a solid yellow Corgi.
Step 4: Add more shades

Except for the base shade, we need more shades to draw a realistic dog. Here we have 2 shades of orange for the coat, a light pink shade for the tongue, and a very dark brown shade for the nose and the eyes.
You may expand the color palette and add more shades to your drawing as you see fit. Just follow the color distribution of a real dog to make sure your drawing captures a realistic look of the dog.
Step 5: Add shadow and light


The next step is shading, where we need to establish the highlights and the shadows of your drawing. Create a new layer and select Blend Mode > Multiply. According to the direction of the light source, we do dark shadow first and then hide the sketch layer to highlight the opposite side. This time, we need to use Blend Mode > Screen. Now, the contrast between light and dark is shown.
Step 6: Create a rough impression of fur

At this step, we mainly add more details to make the dog look more realistic. We need to draw fur flow and dots on key areas such as ears and nose.
Then, based on the light and shadow foundation from the previous step, we refine the details of the dark parts. Use a very dark brown tone to give the dog a little more depth of color and strengthen the stereoscopic effect.
Step 7: Paint a grassland background for the dog

To make the picture richer and more vivid, we paint a layer of grassland background, as if the corgi is leisurely walking on the grass. And then add shadow; there must be a shadow where there is light. We need to pay attention to distinguishing the relationship between the front and back of the layers.
Step 8: Elaborate details of the dog

Although we've added light and shadow, the dog still looks like a combination of color blocks. So now we further shape the form of the dog. We use a smudging tool to blur the edges of the color blocks, making them fit together naturally. Adjust shades and gradations according to the dog's body structure to make the dog look more realistic. Here we can refer to real-life lighting relationships. Add details such as eyes, nose, teeth, collar, and roughly sketch hairs on limbs using brushes.
Step 9: Create different textures

If you want your dog to look more perfect and more vivid, further enhance the details. Create the impression of fur all over the corgi’s body with a very light and very dark orange tone. Then, further express the different materials of each part through color gradients, and add more tones to imitate the dog in the light of the real world.
Get started with XPPen Drawing Displays or Tablets to Enjoy Drawing!

Thank you for joining our dog drawing tutorial! Elevate your art with XPPen drawing displays and tablets. Our high-level X3 smart chip stylus, combined with industry-leading EMR technology, delivers a stable, sharp, and precise pen-on-paper experience. Create all kinds of art with our products compatible with various software. Whether you're a pro or beginner, our XPPen drawing display unleashes your creativity. Shop today to see the difference in your art!
Check out the two great products used in this tutorial:
The Artist 13 (2nd Gen)

The Artist 13 (2nd Gen) drawing display stands out with its large yet portable screen. It offers a natural color display with vivid colors (130% sRGB). The stylus equipped with X3 Chip Technology provides a realistic drawing experience. Enjoy 8,192 levels of pressure sensitivity and tilt sensitivity up to 60 degrees for shading and textures. With nine customizable express keys, you'll have quick access to frequently used functions. Compatible with various systems and software like Adobe Photoshop and more. All these great features come at an affordable price of around $210.
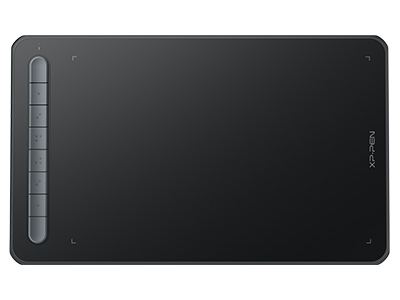
Deco MW - The Best Budget Drawing Tablet

The Deco MW is the best budget drawing tablet, offering a sharp and stable X3 chip stylus for just $70. Enjoy its super power capacity with a long-lasting lithium battery for over 10 hours of use. Benefit from 8,192 levels of pressure sensitivity and Bluetooth 5.0 wireless connection. This slim and portable tablet also includes eight customizable express keys for quick access to functions. Compatible with Windows, Mac, and Android systems, and works with popular software like Adobe Photoshop, Illustrator, and more. A great investment for artists on the go!
Related Posts
About Us
Founded in 2005, XPPen is a leading global brand in digital art innovation under Hanvon UGEE. XPPen focuses on the needs of consumers by integrating digital art products, content, and services, specifically targeting Gen-Z digital artists. XPPen currently operates in 163 countries and regions worldwide, boasting a fan base of over 1.5 million and serving more than ten million digital art creators.
Learn moreRecommended Articles
OTHERS How to Draw Anime Eyes Step-by-step? A Beginner's Guide OTHERS Easy Drawing Ideas for Beginners: 8 Step-by-Step Tutorials KNOWLEDGE Positive and Negative Space in Digital Art: What Every Artist Needs to Know


-
 Artist 13 (2nd Gen)
13.3-inch FHD laminated Anti-glare screen.
96% Adobe RGB.
X3 Smart Chip stylus.
Supports Android.
Battery-free atylus
Compatible with Win/Mac
It features:
-
 Deco M & Deco MW Bluetooth
1000mAh super power capacity
Bluetooth 5.0 wireless connection
X3 Elite smart chip stylus
It features:
3 grams* IAF and 0.6 mm* retraction
distance for more efficient ink output.
Want to elevate your drawing skills?
Discover step-by-step tutorials, expert tips, and creative techniques to boost your drawing skills.
